Booking Details
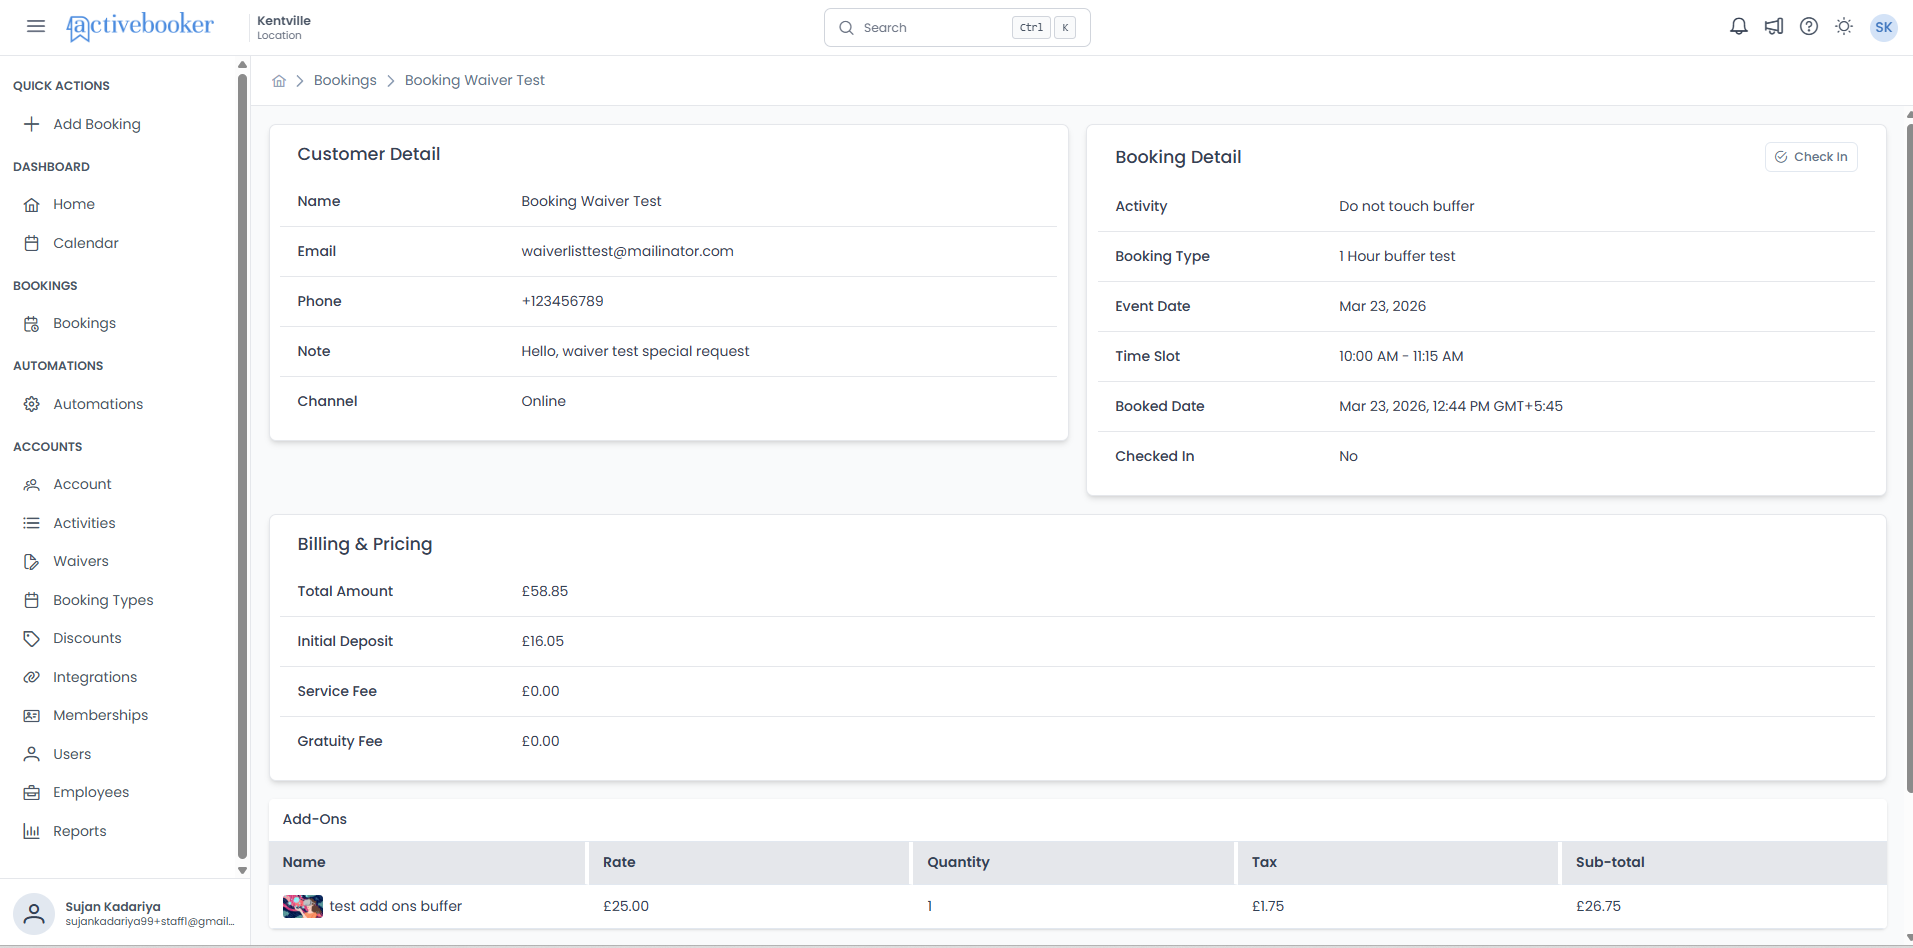
View the complete details of any booking on a single page, including customer information, booking specifics, billing and pricing, any add-ons included in the booking, and any signed waivers associated with the booking. You can also check in a customer directly from this page once they arrive for their activity.
Quick start
View a booking's full details in just a few steps:
- Navigate to Bookings in the left sidebar under the BOOKINGS section
- Find the booking you want to view in the list
- Click the View Detail button in the Actions column
- The Booking Detail page opens with all sections displayed
What you can do
The Booking Detail page helps you:
- Review customer information — See the customer's name, email, phone number, notes, and how they booked
- Check booking specifics — View the activity, booking type, event date, time slot, and when the booking was made
- Understand billing and pricing — See the total amount, deposit, service fee, and gratuity fee with currency values
- View add-ons — See all add-ons included in the booking, along with their name, rate, quantity, tax, and subtotal
- View signed waivers — See all waivers signed by participants, including their personal details and the date they signed
- Access waiver documents — Open the full signed waiver PDF directly from the booking detail page
- Check in a customer — Confirm a customer's arrival and mark their booking as active when they show up for their activity
Navigating to a booking detail page
- Go to the Booking List page by clicking Bookings in the left sidebar
- Find the booking you want to view
- Click the View Detail button (eye icon) in the Actions column
- The Booking Detail page opens as a separate page
The Booking Detail page is entirely read-only. All information is displayed as static text; you cannot edit any fields on this page.
Understanding the booking detail page
The Booking Detail page is organized into three main sections displayed as cards, followed by an Add-Ons section and a Signed Waivers section at the bottom.
Customer Detail
The Customer Detail section appears on the left side of the page and displays information about the person who made the booking.
Name
The full name of the customer who made the booking.
Email
The customer's email address.
Phone
The customer's phone number.
Note
Any special requests or notes the customer included when making their booking. This field may be empty if the customer didn't add any notes.
Channel
How the booking was made — either Online (through your website) or Walkin (in person at your location).
Booking Detail
The Booking Detail section appears on the right side of the page, next to Customer Detail. It shows the specifics of what was booked and when.
Activity
The name of the booked activity (e.g., "Lane 2" or "Axe Arena").
Booking Type
The type of booking selected by the customer (e.g., "1 Hour Hourly Type"). This reflects the duration or structure of the booking.
Event Date
The date the activity is scheduled to take place, shown in MMM DD, YYYY format (e.g., "Mar 24, 2026").
Time Slot
The start and end time of the booking (e.g., "2:30 PM – 3:30 PM").
Booked Date
The date and time when the booking was originally created, shown with the time zone (e.g., "Mar 23, 2026, 1:55 PM GMT+5:45").
Checked In
Shows whether the customer has been checked in for their booking. Displays "No" if the customer has not yet arrived, or "Yes" if they have already been checked in.
Billing & Pricing
The Billing & Pricing section appears below the Customer Detail and Booking Detail sections. It provides a complete breakdown of the booking's financial details.
Total Amount
The full price of the booking, displayed with the currency symbol (e.g., "$61.38"). This is the overall amount charged for the booking including all applicable fees.
Initial Deposit
The deposit amount collected at the time of booking (e.g., "$61.38"). This may be the full amount, a percentage, a flat amount, or a per-person amount depending on your deposit settings.
Service Fee
Any service fee applied to the booking (e.g., "$6.38"). This could be a flat amount or a percentage of the booking total, depending on your account configuration.
Gratuity Fee
Any gratuity or tip amount included in the booking (e.g., "$0.00"). Displays "$0.00" when no gratuity was applied.
Amount Due The remaining balance that still needs to be collected for the booking. When this value is greater than $0.00, the Pay Amount Due button appears in the top-right corner of the Billing & Pricing card.
All monetary values in the Billing & Pricing section are displayed with your location's configured currency symbol.
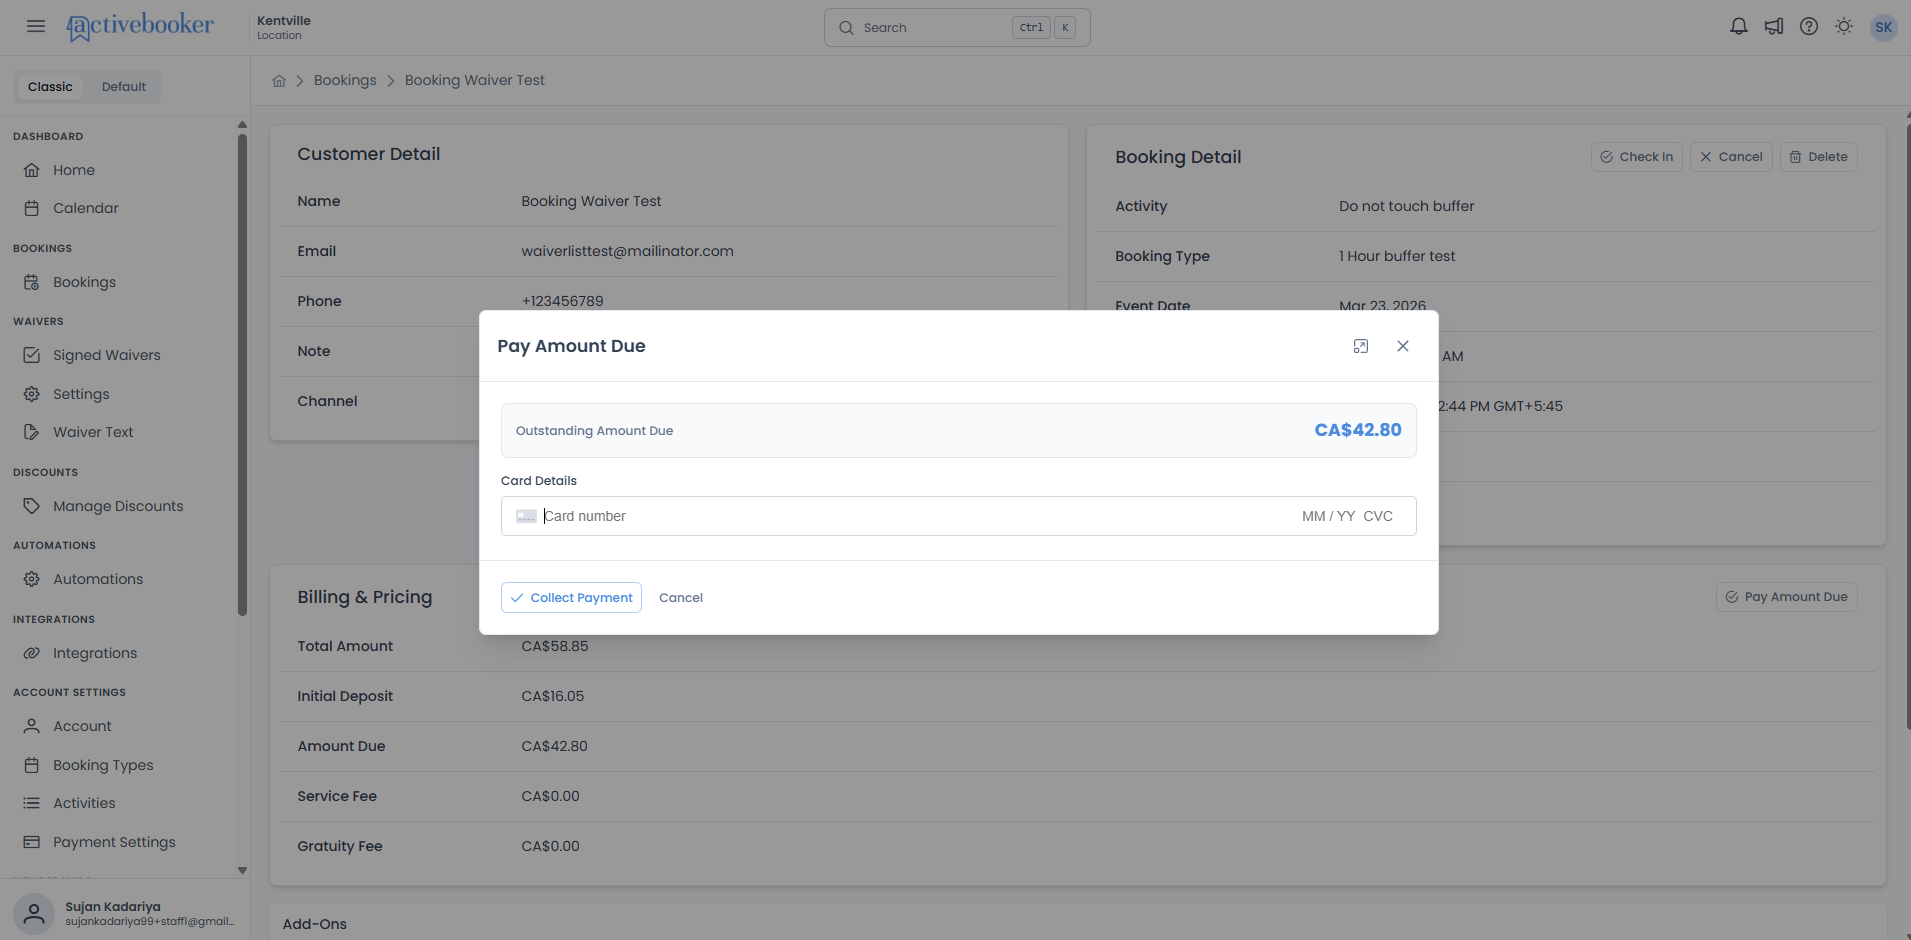
Paying Amount Due
When a booking has an outstanding balance, you can collect the remaining payment directly from the Booking Detail page using the Pay Amount Due button in the Billing & Pricing card.
Opening the Pay Amount Due modal
- Open the booking detail page for a booking that still has an amount due
- Look at the top-right corner of the Billing & Pricing card
- Click the Pay Amount Due button
- The Pay Amount Due modal opens and shows the outstanding balance and payment fields
What the modal shows
The Pay Amount Due modal lets you review the remaining balance before taking payment. It displays the outstanding amount due at the top of the dialog and includes the card details area required by the connected payment provider.
Completing payment
- Enter the required payment details in the modal
- Click Collect Payment
- Wait for the payment to process and for the booking detail page to refresh
- The booking's Amount Due value updates after the payment is successfully collected
When the booking has no balance due
If the booking's Amount Due is $0.00, the Pay Amount Due button is not shown in the Billing & Pricing card.
Refunding a Booking
If a paid booking needs to be refunded, you can return all or part of the deposit from the Booking Detail page.
When the Refund button appears
The Refund button appears in the top-right corner of the Billing & Pricing card when the booking is Paid and has an Initial Deposit greater than $0.00.
The Refund button is not shown when the booking is Unpaid, Refunded, Partially Refunded, or Cancelled.
If the booking still has an Amount Due, the Pay Amount Due button can appear next to the Refund button.
Only the deposit can be refunded from this page.
Opening the refund window
- Open the booking detail page for the booking you want to refund.
- Click the Refund button in the Billing & Pricing card.
- The Refund Payment window opens.
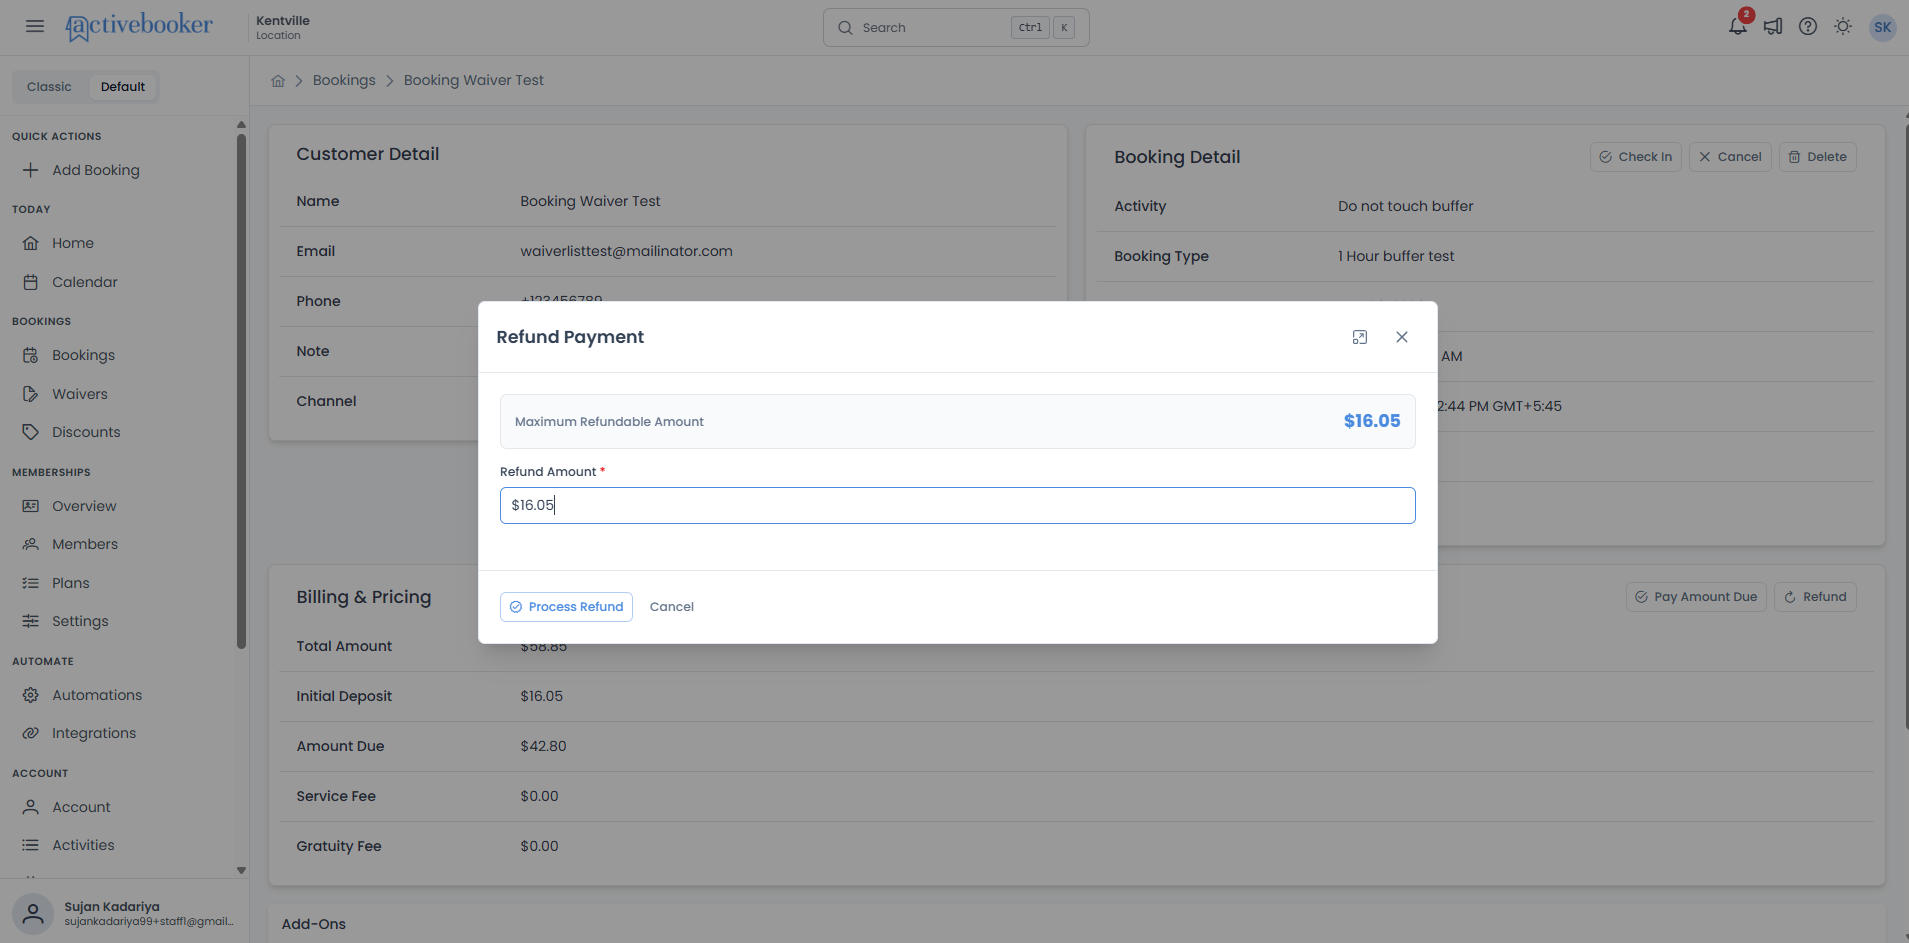
What the refund window shows
- The Refund Payment title
- The Maximum Refundable Amount
- The Refund Amount field, filled with the full deposit amount
- The Process Refund button
- The Cancel button
Completing a refund
- Change the refund amount if you want to refund less than the full deposit.
- Click Process Refund.
- Wait for the refund to finish.
- When it is done, a success message appears and the page refreshes.
After a successful refund, the booking status changes to Refunded or Partially Refunded, depending on the amount returned.
If the refund cannot be completed, the window stays open so you can try again.
Partial refunds
Partial refunds are supported on Stripe and Square when the refund amount is less than the maximum refundable deposit.
For Clover, only full refunds are supported. If you enter a smaller amount, the refund is rejected and the dialog stays open so you can try again.
After a successful refund
Once a refund completes, the booking detail page refreshes to show the updated payment status.
Customers receive a Refund Receipt email for the refunded booking, and admins linked to the location receive a Booking Refunded in-app notification. If the location has a BookingCancelled webhook subscription configured, the system also dispatches the webhook payload for the refunded booking.
Checking In a Booking
Check-in confirms that a customer has arrived and is ready to begin their booked activity. Once a booking is checked in, the session is considered active and the assigned lanes or resources are marked as in use for that booking's duration. This helps your staff keep track of who is on-site, manage ongoing sessions, and maintain an accurate record of attendance.
Once a booking has been checked in, it cannot be undone. Make sure the customer is present before confirming.
The Check In button
The Check In button appears in the top-right corner of the Booking Detail card, but only when the booking has not yet been checked in. Once a booking is already checked in, the button is hidden and the Checked In field shows "Yes".
How to check in a booking
- Open the booking detail page for the customer's booking
- Confirm the Checked In field shows "No" and the Check In button is visible in the Booking Detail toolbar
- Click the Check In button
- A confirmation dialog appears with the message: "Are you sure you want to check in this booking? This action cannot be undone."
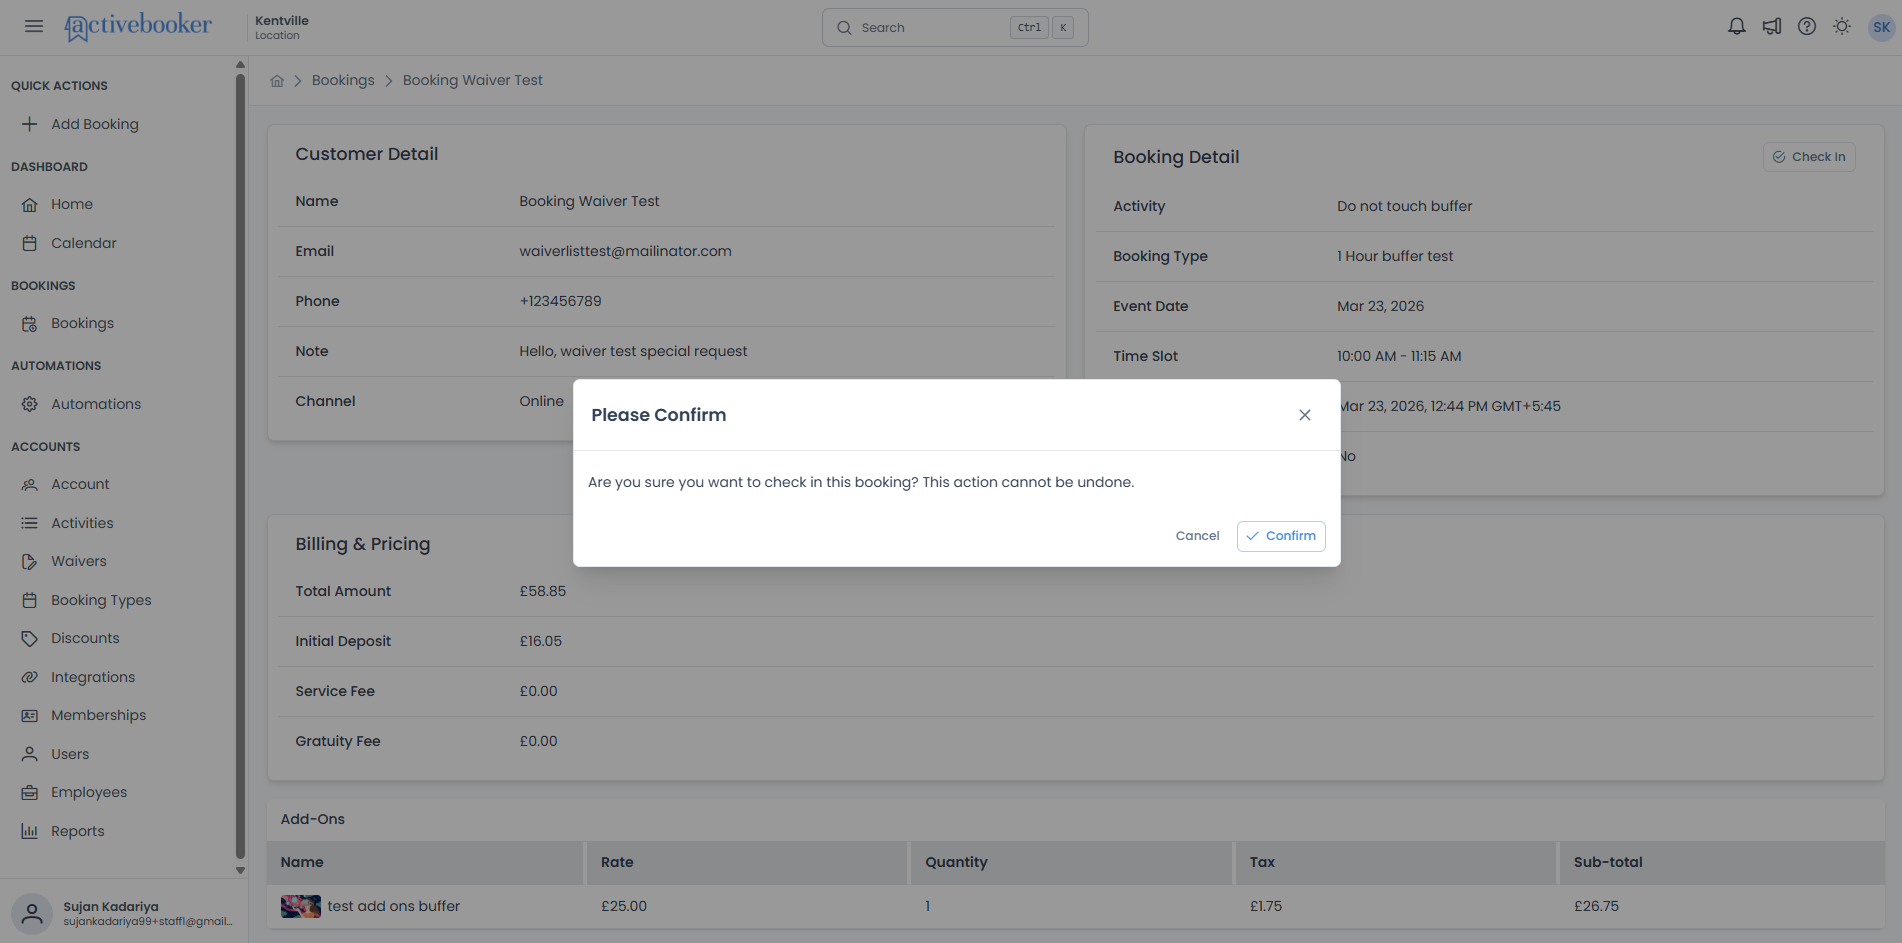
- Click Confirm to proceed, or Cancel to go back without making any changes
- Once complete, a success message confirms the booking has been checked in
- The page refreshes automatically — the Checked In field now shows "Yes" and the Check In button is no longer visible
Group bookings
When you check in a parent booking that has associated child bookings, all linked child bookings are also marked as checked in at the same time.
Cancelling a Booking
Cancelling a booking changes its status to Cancelled and removes it from the active Bookings list. The booking is not deleted, you can still find it by selecting the Cancelled filter on the Bookings list. When a booking is cancelled, the customer automatically receives a cancellation email with their booking details.
Once a booking has been cancelled, its status cannot be changed back. Make sure you want to cancel the booking before confirming.
The Cancel button
The Cancel button appears in the Booking Detail toolbar and is only available when the booking's payment status is Paid. It is not visible for bookings that are already Cancelled, Refunded, or Partially Refunded.
The Cancel button is temporarily disabled while the page is loading or while another action is already in progress.
How to cancel a booking
- Open the booking detail page for the booking you want to cancel
- Click the Cancel button in the Booking Detail toolbar
- A confirmation dialog appears with the message: "Are you sure you want to cancel this booking? This action cannot be undone."
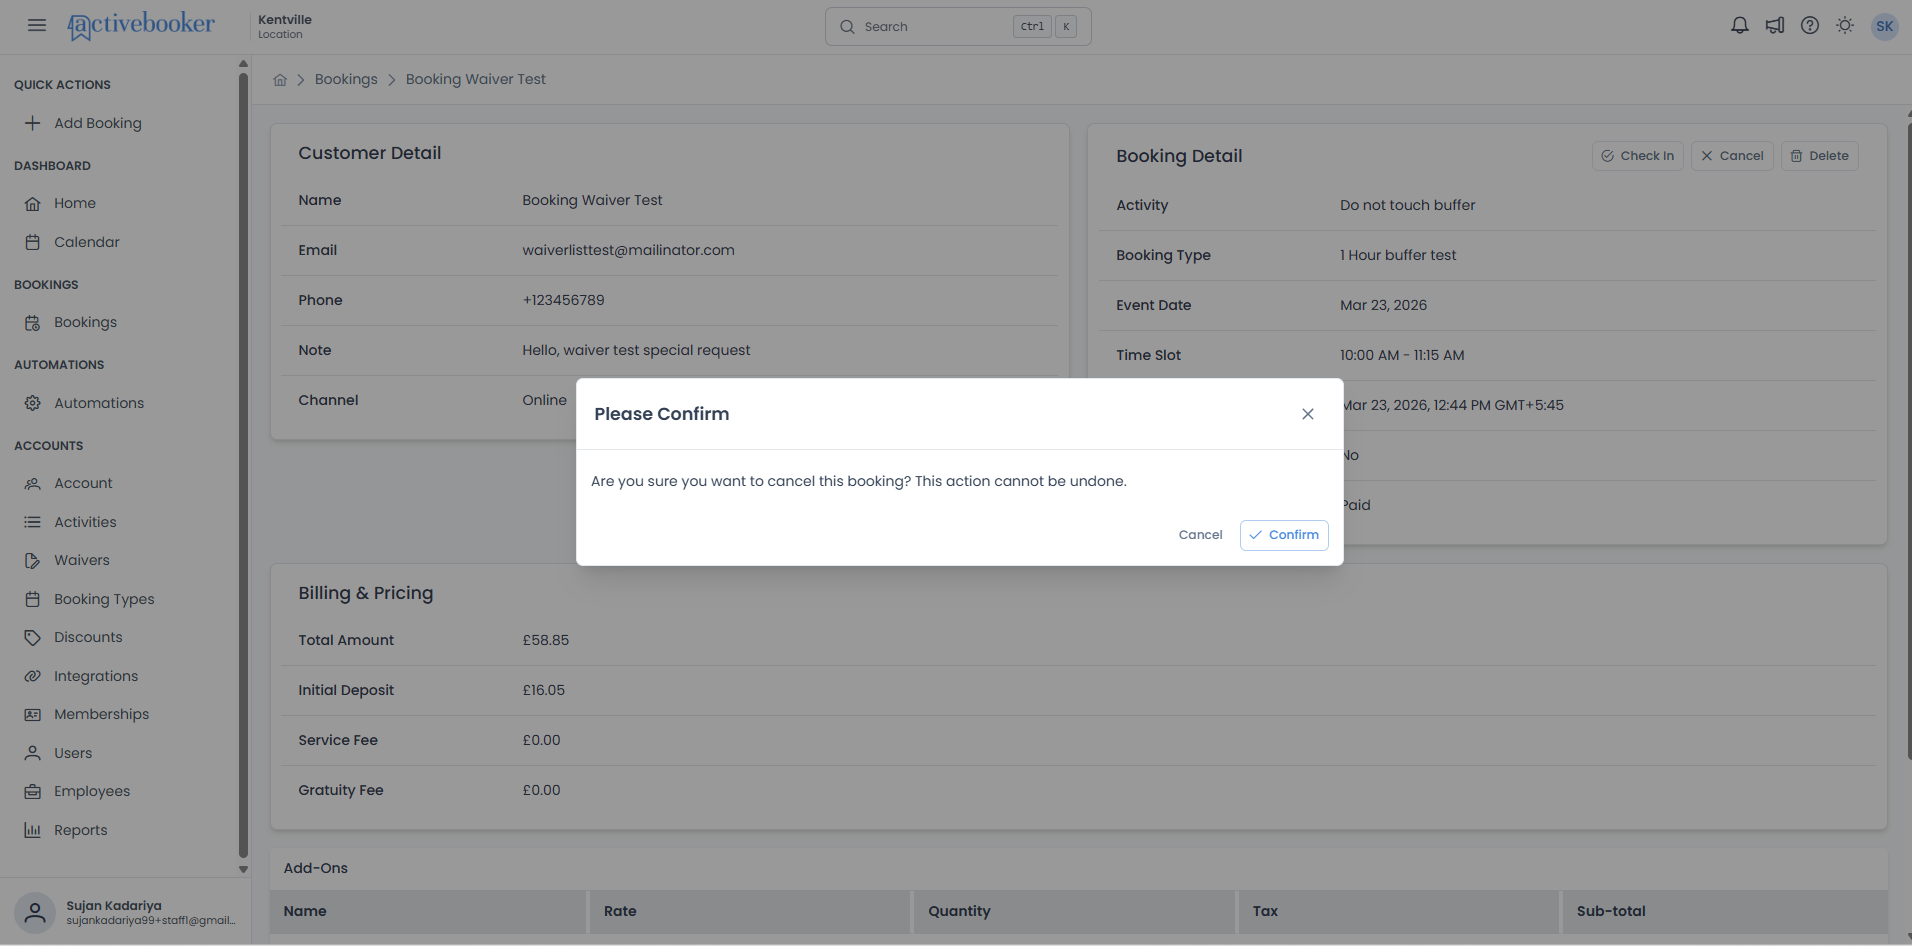
- Click Confirm to proceed, or Cancel to go back without making any changes
- A "Cancelling booking..." message appears on screen while the request is being processed
- Once complete, a success message confirms the booking has been cancelled and the page refreshes automatically
What happens after cancellation
- The booking's Status updates to Cancelled
- The Cancel and Check In buttons are no longer visible in the toolbar and only the Delete button remains
- The booking no longer appears in the Active tab of the Bookings list
- The booking appears in the Cancelled tab of the Bookings list
- The customer automatically receives a Cancellation Receipt email containing their booking details
Deleting a Booking
Deleting a booking permanently removes it from your active bookings. Once deleted, the booking will no longer appear in the default Bookings list, it can only be found by selecting the Deleted filter. Deleting a booking does not issue a refund; any refunds must be handled separately before or after deletion.
Once a booking has been deleted, it cannot be restored. Make sure you want to remove the booking before confirming.
The Delete button
The Delete button appears in the Booking Detail toolbar alongside other actions such as Check In and Cancel. It is available for bookings in any payment status — Paid, Pending, Cancelled, Refunded, or Partially Refunded and regardless of whether the booking has been checked in.
The Delete button is temporarily disabled while the page is loading or while another action (such as Check In or Cancel) is already in progress.
How to delete a booking
- Open the booking detail page for the booking you want to remove
- Click the Delete button in the Booking Detail toolbar
- A confirmation dialog appears with the message: "Are you sure you want to delete this booking? This action cannot be undone."
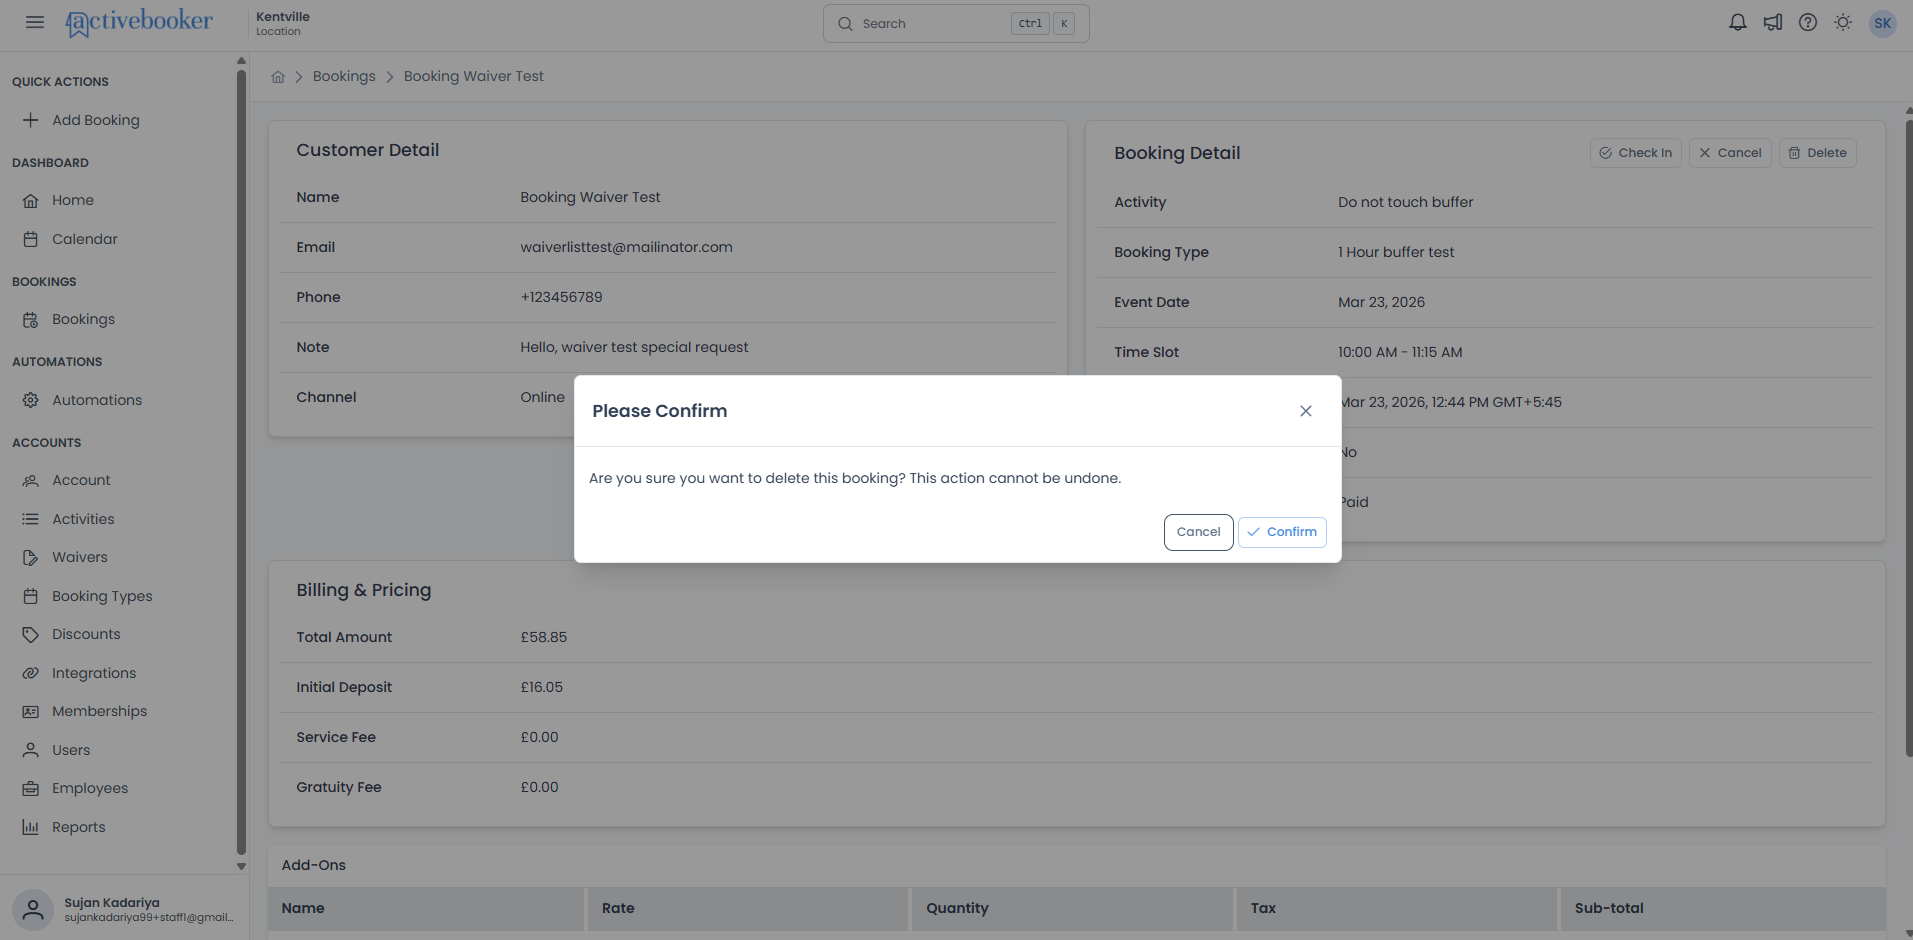
- Click Confirm to proceed, or Cancel to go back without making any changes
- A "Deleting booking..." message appears on screen while the request is being processed, all buttons on the page are disabled during this time
- Once complete, a success message confirms the booking has been deleted and you are automatically taken back to the Bookings list
What happens after deletion
- The booking no longer appears in the default Bookings list
- You can still find the deleted booking by selecting the Deleted filter on the Bookings list
- Navigating directly to the booking's page will show a not-found message, the booking is no longer accessible via its original link
Group bookings
When you delete a parent booking that has associated child bookings, all linked child bookings are also deleted at the same time.
Add-Ons
The Add-Ons section appears below the Billing & Pricing section. It lists any extra items or services that were added to the booking at the time it was created.
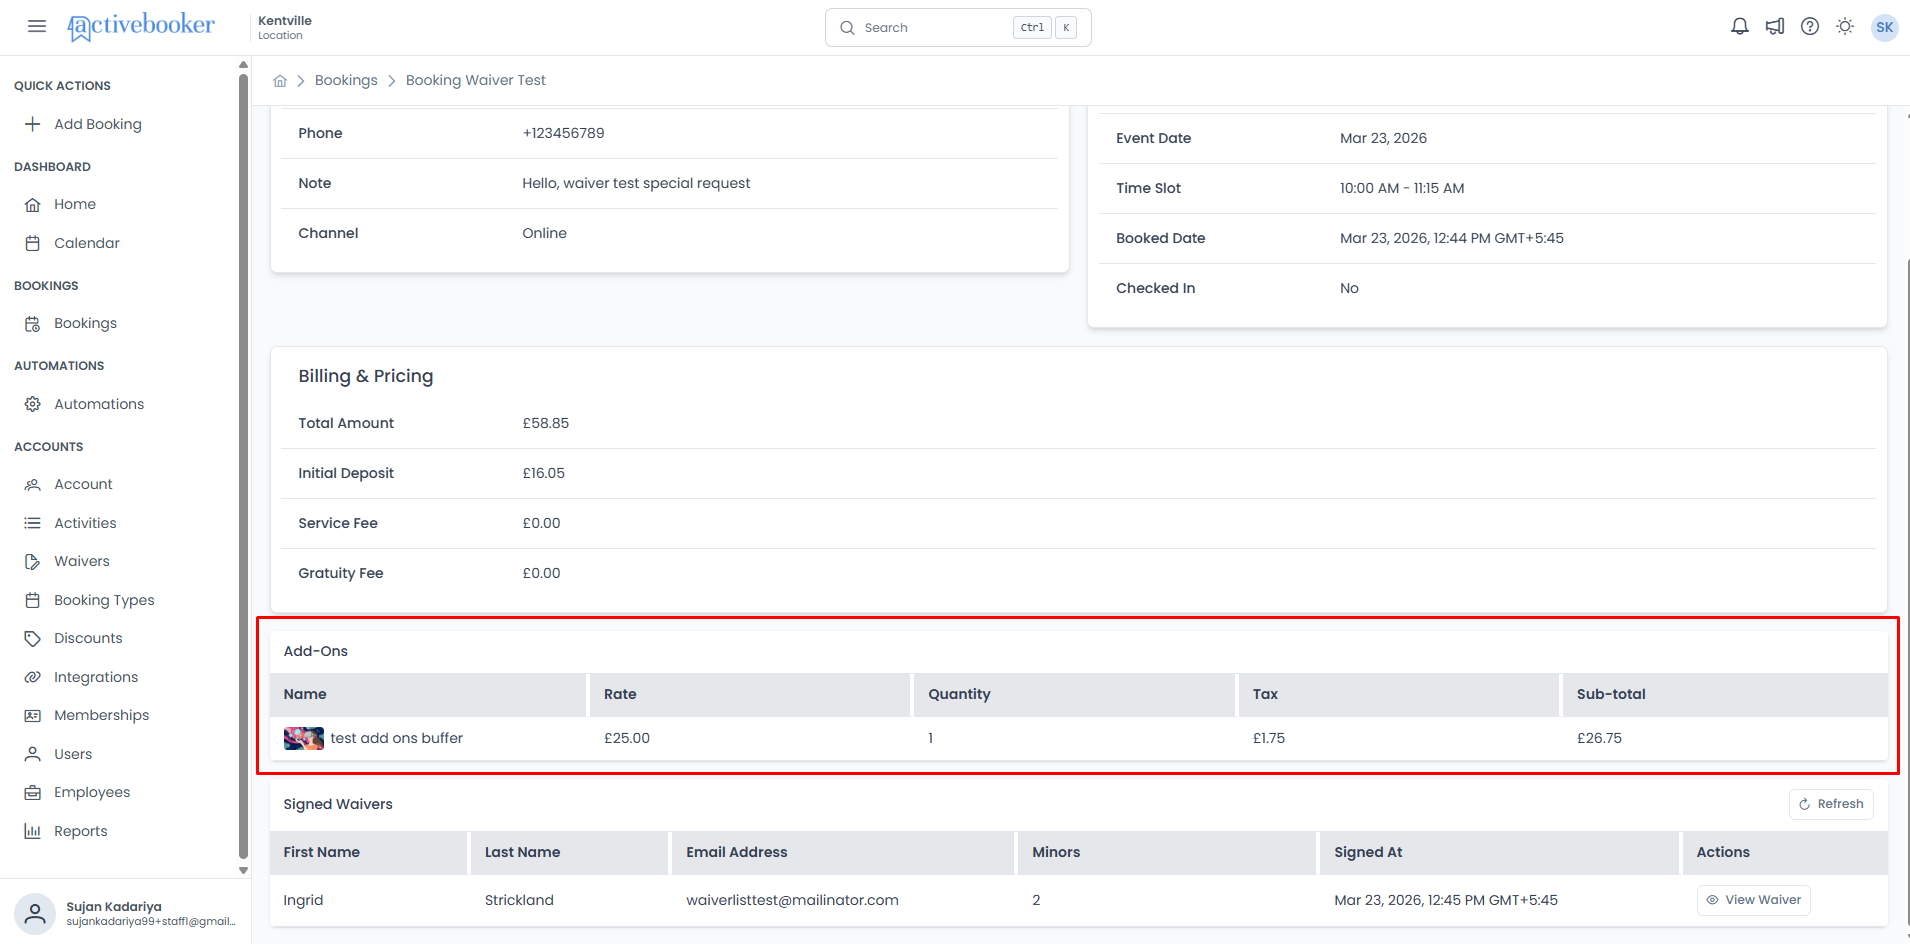
Add-Ons table
The table displays the following columns for each add-on:
Name
The name of the add-on, shown alongside a thumbnail image. If no image has been set up for the add-on, a default placeholder icon is displayed instead.
Rate
The unit price of the add-on, displayed with the currency symbol (e.g., "$10.00").
Quantity
The number of units of the add-on that were selected during booking creation (e.g., "3").
Tax
The tax amount applied to the add-on (e.g., "$3.00"). Displays "$0.00" if the add-on is tax-exempt.
Sub-total
The total cost for that add-on row, calculated as (Rate × Quantity) + Tax (e.g., ($10.00 × 3) + $3.00 = $33.00).
When no add-ons are included
If the booking was created without any add-ons, the table displays the message: "There are no entries to display."
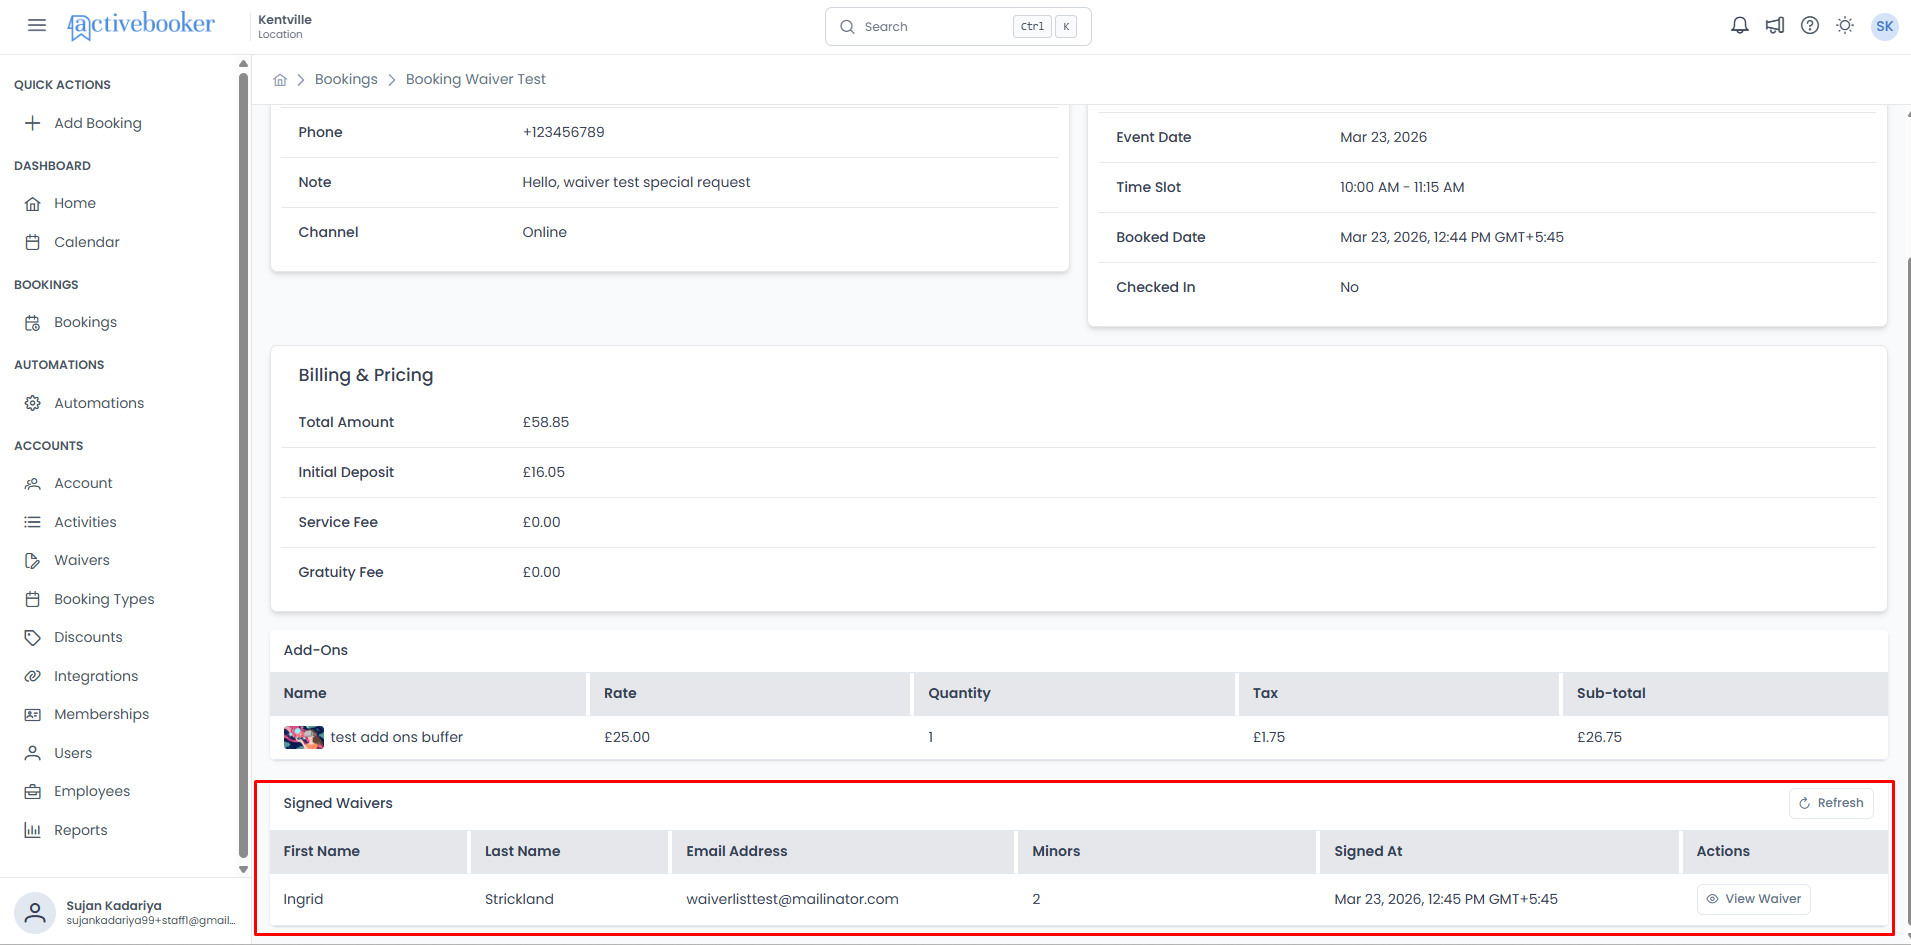
Signed Waivers
The Signed Waivers section appears at the bottom of the Booking Detail page. It lists all waivers that participants have signed for this booking.
What are signed waivers?
Waivers are liability documents that customers sign before participating in an activity. The Signed Waivers section on the booking detail page shows you exactly who has signed a waiver for this particular booking, making it easy to verify that all participants are covered.
Signed Waivers table
The table displays the following columns for each signed waiver:
First Name
The first name of the person who signed the waiver.
Last Name
The last name of the person who signed the waiver.
Email Address
The email address of the signer (e.g., "jordan.smith@example.com").
Minors
The number of minors (children) included under this waiver. Displays "0" if no minors are covered.
Signed At
The date and time the waiver was signed, shown with the time zone (e.g., "Mar 25, 2026, 5:32 AM GMT+5:45").
Actions
Contains a View Waiver button. Click it to open the signed waiver document as a PDF in a new browser tab.
When no waivers are signed
If no one has signed a waiver for this booking, the table displays the message: "There are no entries to display."
Refreshing the waivers list
Click the Refresh button in the top-right corner of the Signed Waivers section to reload the waiver data. This is useful if a customer has just signed their waiver and you want to confirm it appears in the list without refreshing the entire page.
Viewing a signed waiver PDF
To view the full waiver document that a participant signed:
- Scroll down to the Signed Waivers section on the booking detail page
- Find the participant's row in the table
- Click the View Waiver button in the Actions column
- A new browser tab opens with the signed waiver as a PDF document
The PDF includes all the information the signer provided on the waiver form, such as their name, email, phone number, emergency contact details, address, and their signature.
Common scenarios
Scenario 1: Verifying a customer's booking before their visit
A customer arrives for their activity and you want to confirm their booking:
- Navigate to Bookings and search for the customer's name
- Click View Detail on their booking
- Confirm the Activity, Event Date, and Time Slot in the Booking Detail section
- Check the Billing & Pricing section to verify payment details
Scenario 2: Checking in a customer when they arrive
A customer has arrived for their activity and you want to mark them as checked in:
- Navigate to Bookings and find the customer's booking
- Click View Detail to open the booking detail page
- Confirm the Checked In field shows "No" and the Check In button is visible
- Click Check In in the Booking Detail toolbar
- Read the confirmation message and click Confirm
- Wait for the page to refresh — the Checked In field will update to "Yes"
Scenario 3: Checking if all participants have signed waivers
Before an activity begins, you want to make sure everyone has signed their waiver:
- Open the booking detail page for the relevant booking
- Scroll down to the Signed Waivers section
- Review the list of signers and compare it against the number of participants
- If a waiver is missing, ask the participant to sign before the activity starts
- Click Refresh after they sign to confirm it appears in the list
Scenario 4: Reviewing a signed waiver document
A customer has a question about what they agreed to in their waiver:
- Open the booking detail page
- Scroll to the Signed Waivers section
- Find the customer's entry in the table
- Click View Waiver to open the full PDF
- Review the document together with the customer
Best practices
✅ Check waivers before activities begin — Always verify that all participants have signed their waivers before starting an activity to ensure your business is protected
✅ Use the Refresh button — If a waiver was just signed, click Refresh in the Signed Waivers section instead of reloading the entire page
✅ Check in only when the customer is present — Check-in cannot be undone, so always confirm the customer is on-site before clicking Confirm
✅ Check in before the session starts — Marking a booking as checked in early helps your team see which lanes and resources are currently occupied, making it easier to manage the rest of your schedule
❌ Don't assume all participants have signed — Even if the booking shows signed waivers, verify the count matches the actual number of participants attending
Frequently asked questions
Can I edit the booking details?
No. The Booking Detail page is entirely read-only. All fields are displayed as static text and cannot be modified from this page.
Why does the Signed Waivers section show "There are no entries to display"?
This means no one has signed a waiver for this booking yet. Once a participant signs their waiver, it will appear in this section. Click Refresh to check for newly signed waivers.
What does the Minors column mean in the Signed Waivers table?
The Minors column shows how many children are covered under that particular signed waiver. For example, if a parent signs a waiver and includes two children, the Minors column will show "2". If no minors are included, it shows "0".
Can I download the signed waiver PDF?
Yes. When you click View Waiver, the PDF opens in a new browser tab. From there, you can use your browser's download or print options to save a copy.
How do I get back to the booking list?
Click Bookings in the breadcrumb at the top of the page, or click Bookings in the left sidebar to return to the full booking list.
Why does the Add-Ons section show "There are no entries to display"?
This means the booking was created without any add-ons. The Add-Ons section always appears on the page, but only shows rows when add-ons were included at the time the booking was made.
How is the Sub-total calculated for an add-on?
The Sub-total is calculated as (Rate × Quantity) + Tax. For example, if an add-on costs $10.00, was selected 3 times, and has a tax of $3.00, the Sub-total will be $33.00.