Booking Type Prompt
Booking Type Prompt shows a custom message to customers when they select a specific booking type during checkout — use it for safety information, policies, or instructions they need before they book.
Quick start
- Open a booking type's detail page inside an activity and click the Content tab
- In the Booking Type Prompt section, click Edit
- Check Enable Booking Type Prompt, write your message, and click Save
This prompt is shared across every activity that uses this booking type. Editing it updates the message everywhere at once.
What you can do
Booking Type Prompt helps you:
- Communicate important information — Share details customers need before booking
- Set expectations — What to bring, know, or prepare
- Display safety requirements — Age restrictions, health conditions, required gear
- Highlight policies — Cancellation rules, late-arrival policy, special conditions
How it works
When enabled, the prompt appears as a popup the moment a customer selects this booking type on your online booking page, before they continue. Because the booking type — not the activity — owns the message, every activity that reuses this booking type shows the exact same popup.
Example: A trampoline park's "Open Jump" booking type is offered at three locations. Whichever location a customer books from, selecting "Open Jump" shows the same safety message, because all three activities share that one booking type.
Accessing the prompt
- Navigate to Activities, select your activity, then click Booking Types
- Click View Detail on the booking type you want to configure
- Click the Content tab
- Scroll to the Booking Type Prompt section
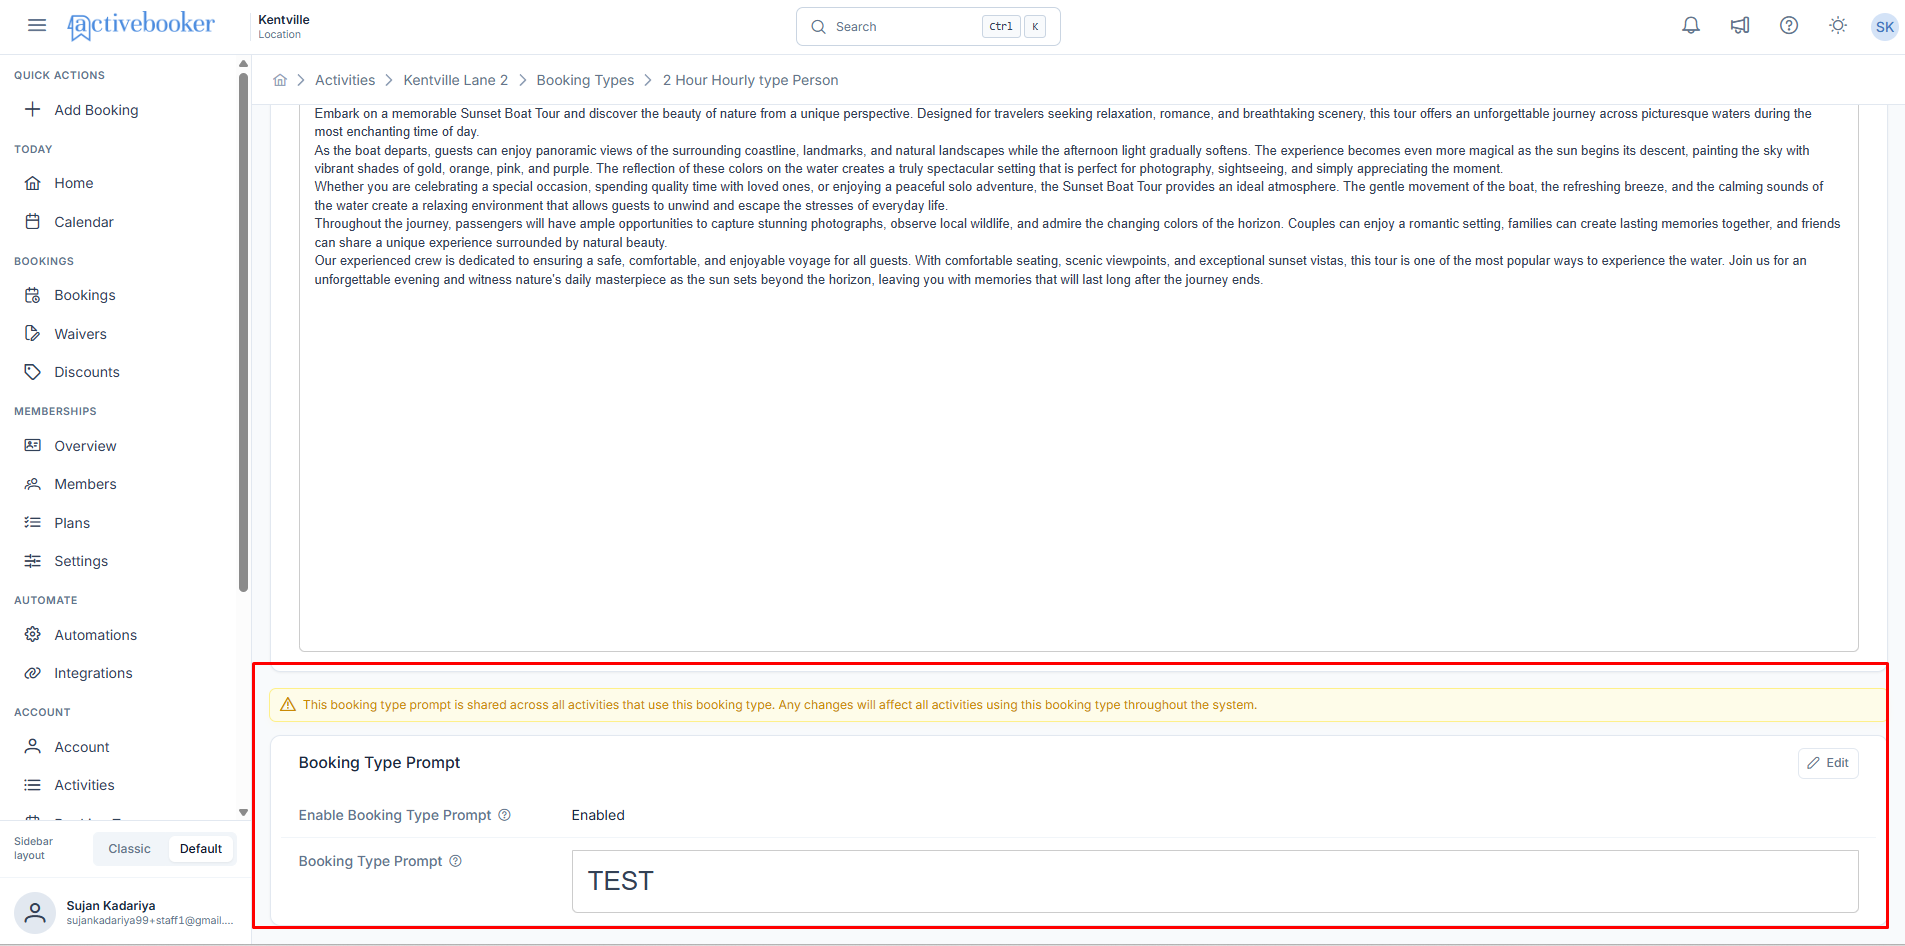
The section shows whether the prompt is Enabled or Disabled. When enabled with content, it also displays your message exactly as customers see it, in a read-only view.
Creating or editing a prompt
-
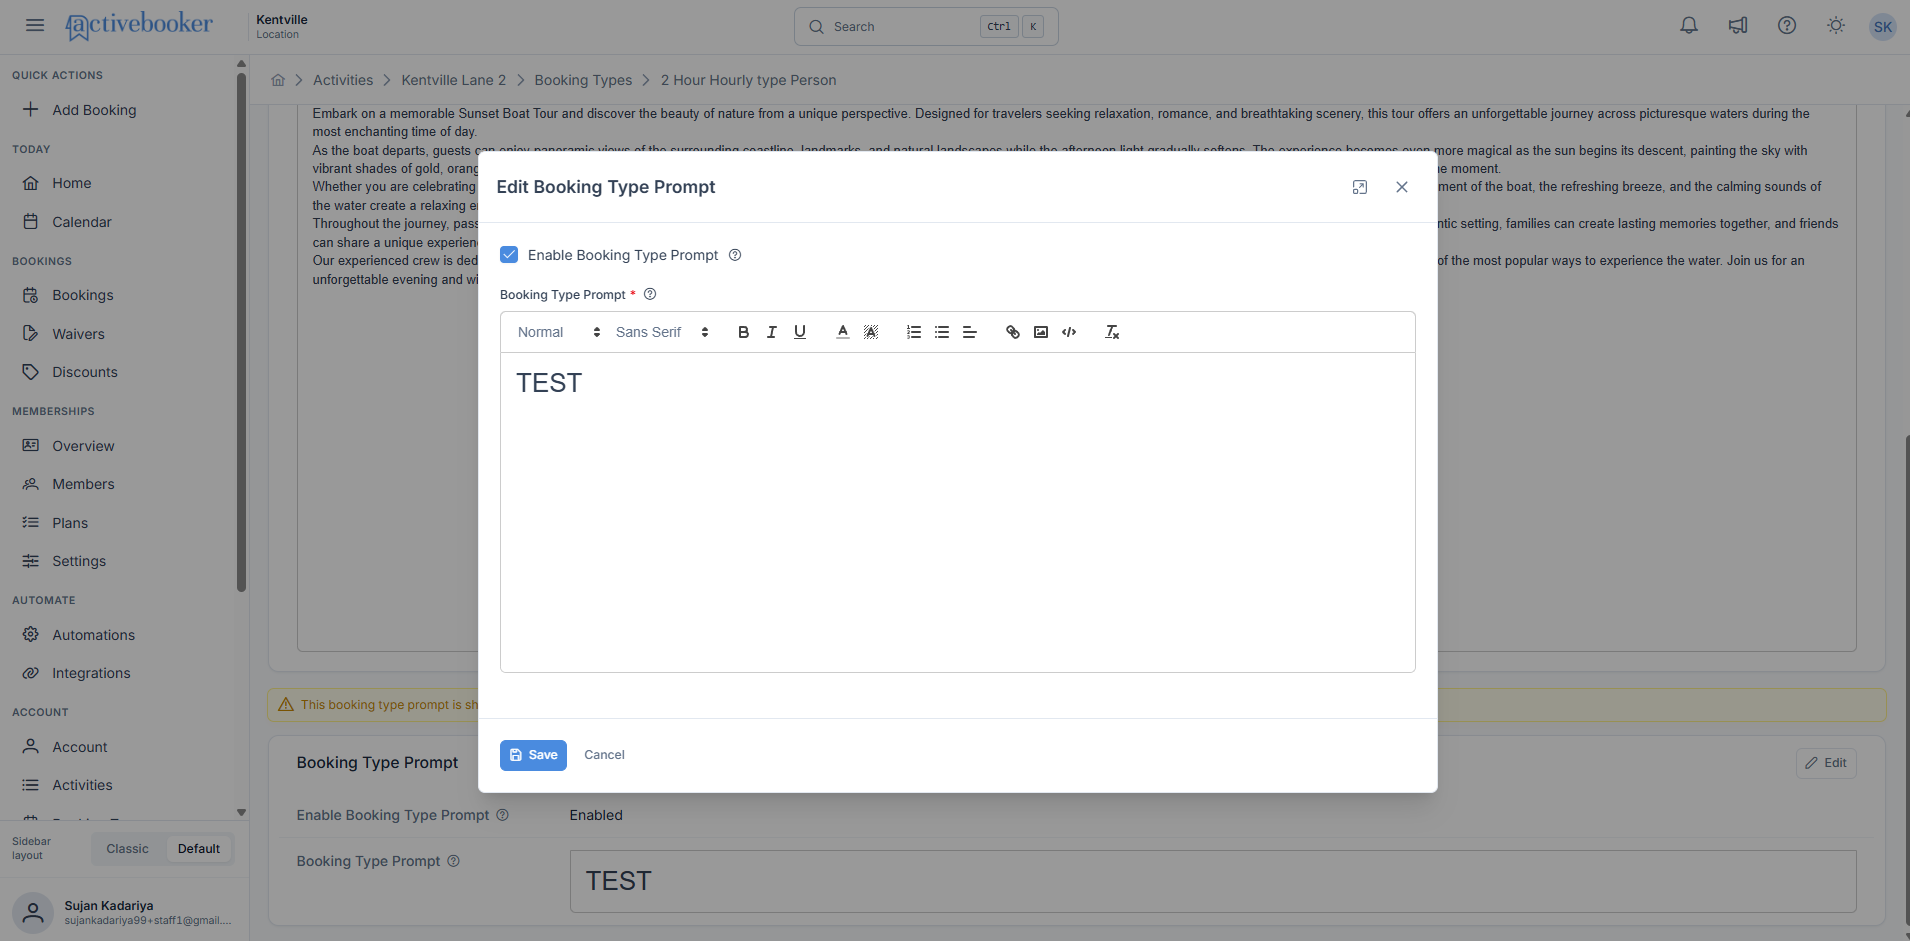
Click Edit in the Booking Type Prompt section
-
Check Enable Booking Type Prompt — the message editor appears once it's checked
-
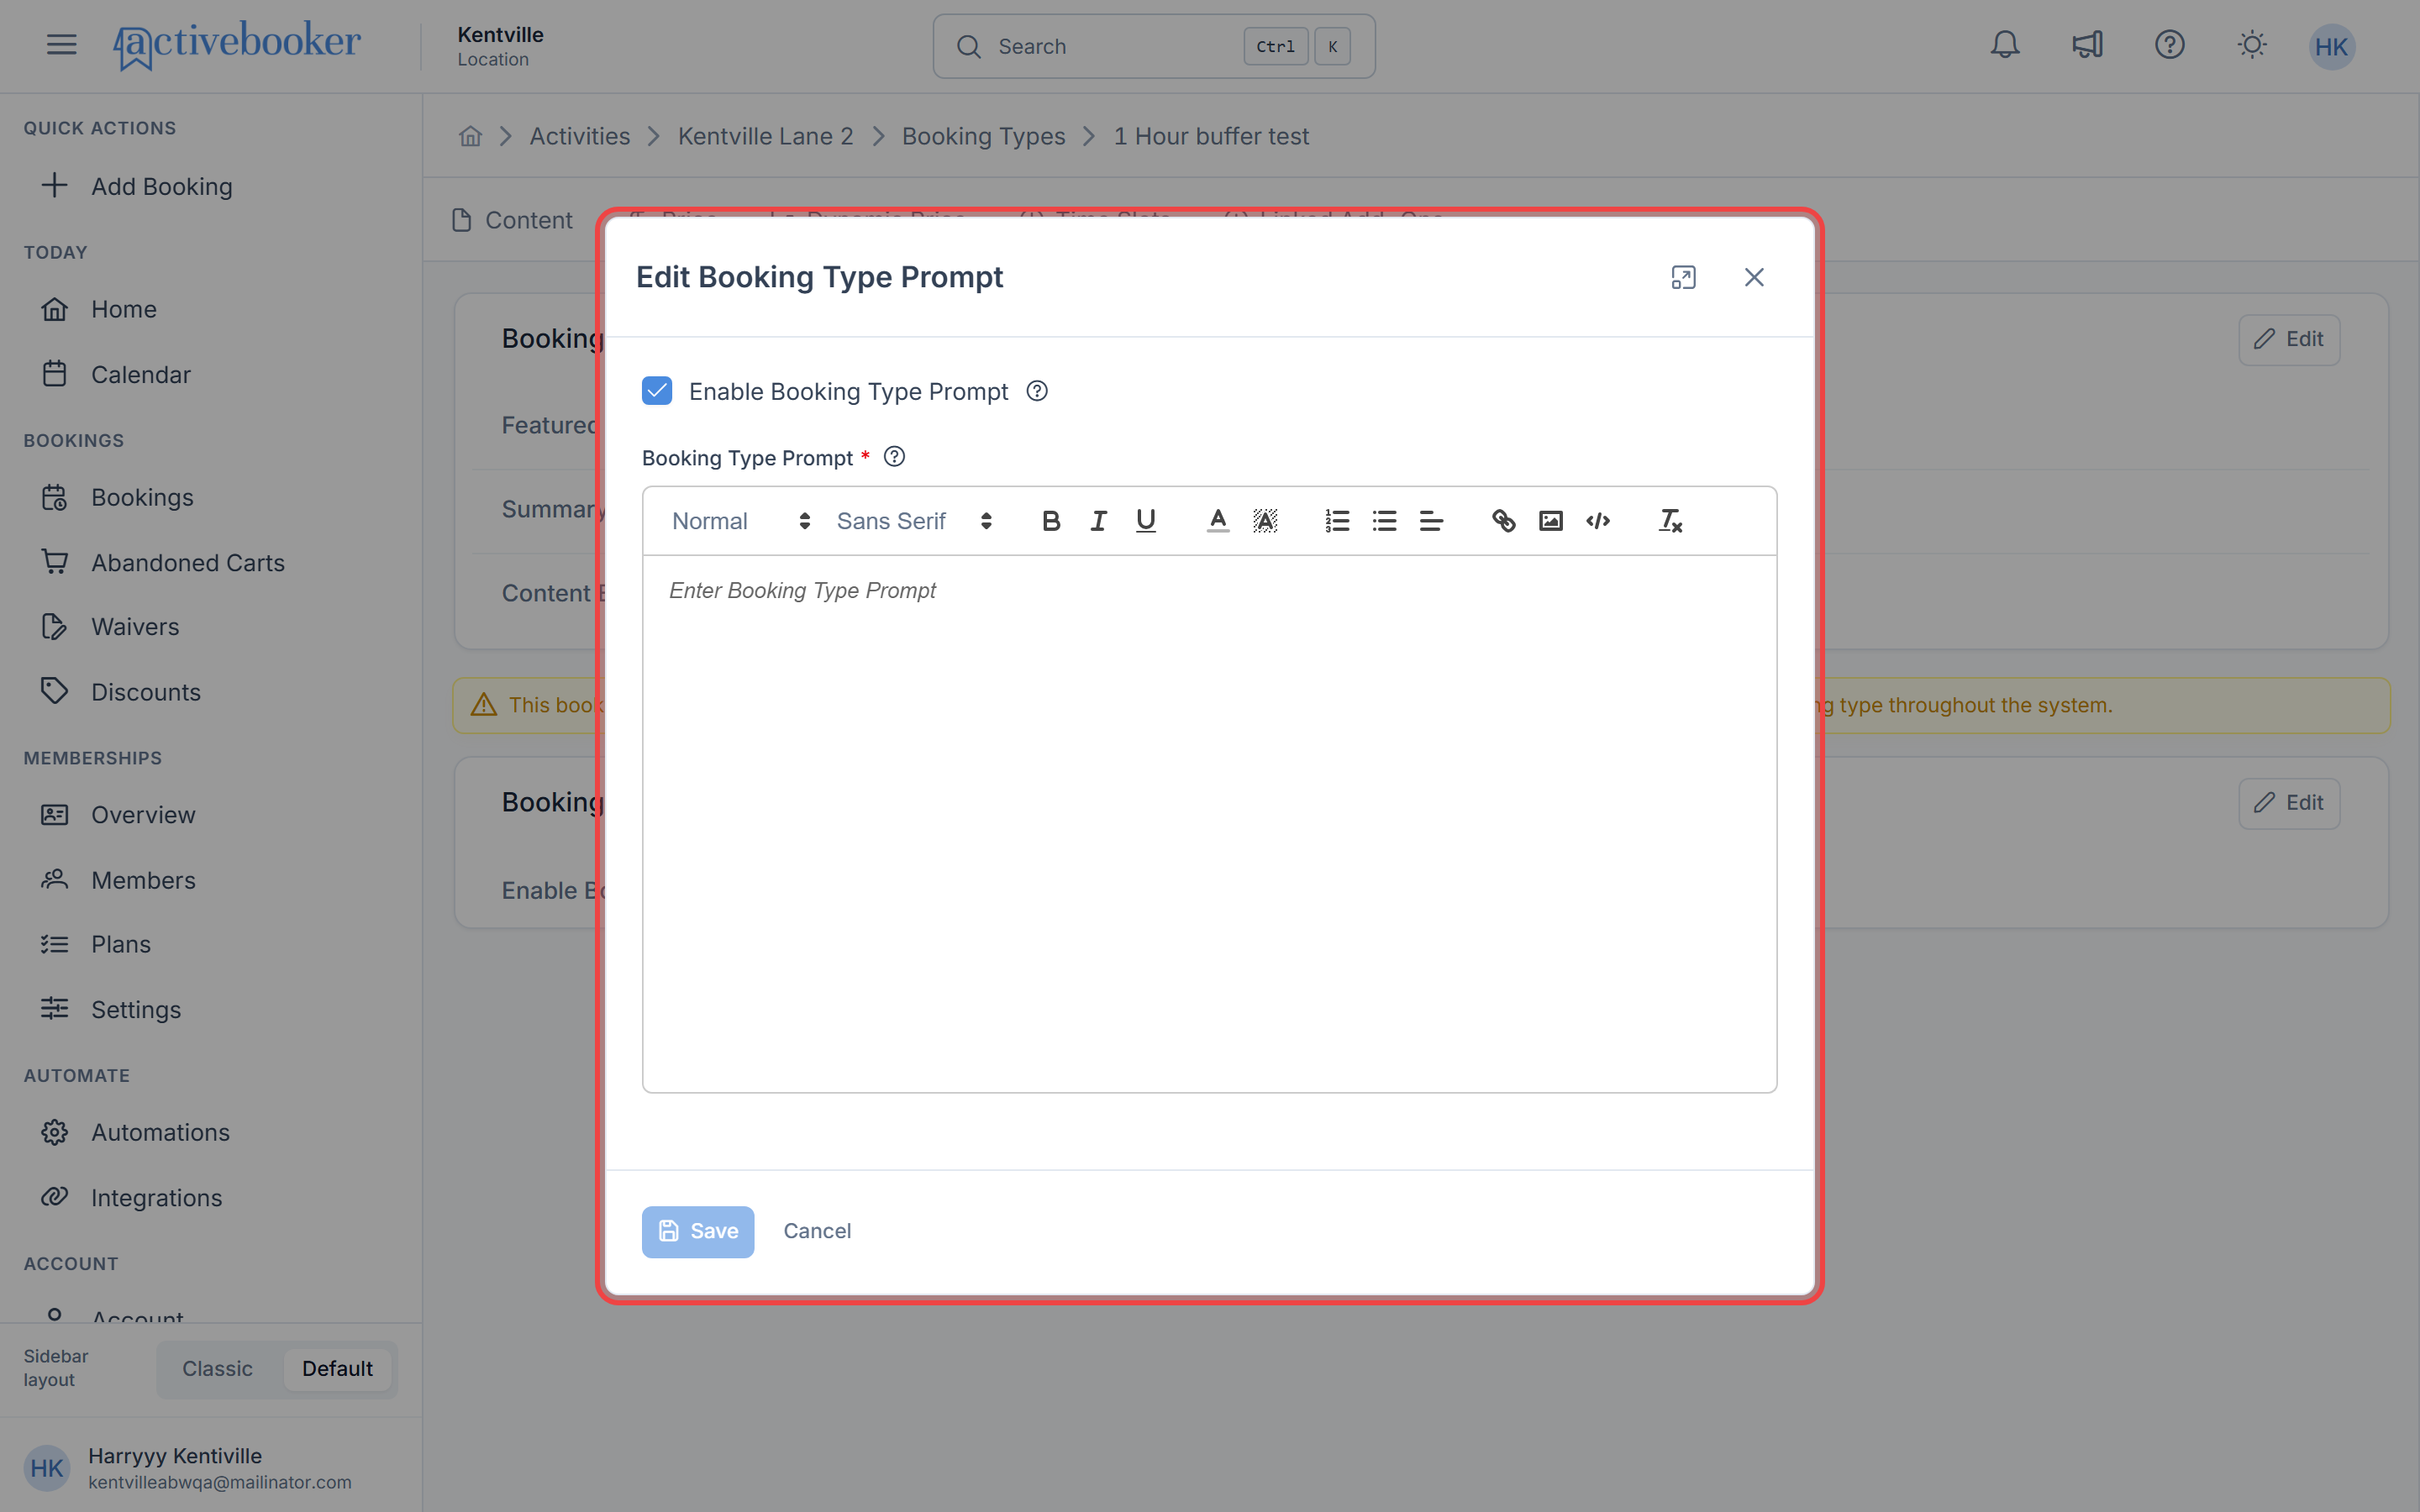
Write your message in the rich text editor
-
Click Save
The prompt takes effect immediately for new bookings.
Write and format your message with the checkbox unchecked, then enable it once you're happy with it. Customers won't see anything until you check the box and save.
Best practices
✅ Keep it short — Customers are mid-checkout; lead with the one or two things they most need to know
✅ Put the critical detail first — Bold key words, use bullet points, keep paragraphs to a couple of lines
✅ Be action-oriented — "Sign your waiver online before arriving: [link]" beats "Waivers are available on our website"
❌ Don't use it for location-specific details — Parking instructions or single-location notices will bleed into every activity that shares this booking type
❌ Don't bury the message in long paragraphs — Long prompts get dismissed unread
Unchecking Enable Booking Type Prompt hides the popup without deleting your message — the content is preserved so you can re-enable it later. If you also clear the message text before saving, that content is lost for good.
Frequently asked questions
Does the prompt appear for every booking?
Yes, whenever enabled, every customer who selects this booking type sees it, regardless of activity.
Can customers skip it?
Yes — it's informational, not a hard block. They can close it and continue booking.
Can I have a different prompt per location?
Not with a shared booking type. If you need location-specific messaging, create a separate booking type for that location.
Can I include images?
Yes, the rich text editor supports image uploads.
Does it appear in confirmation emails?
No — it only shows during the booking flow when the customer selects the booking type.
Troubleshooting
The message field doesn't appear in the editor
Why this happens: The prompt editor only renders once Enable Booking Type Prompt is checked.
How to fix it: Check the box first — the rich text editor appears below it.
Changes aren't saving
Why this happens: The message field is required while the prompt is enabled — an empty message blocks saving.
How to fix it: Add content before saving, or uncheck Enable Booking Type Prompt if you want to disable it without content.
Related resources
- Booking Type Content — Manage the booking type's images and description
- Booking types overview — How booking types are shared across activities
- Add a booking type — Create a new booking type