Member Information
Viewing Member Details
To view complete member information:
- Navigate to Memberships > Members
- Find the member in the list
- Click on the member row or View Detail to open their detail page
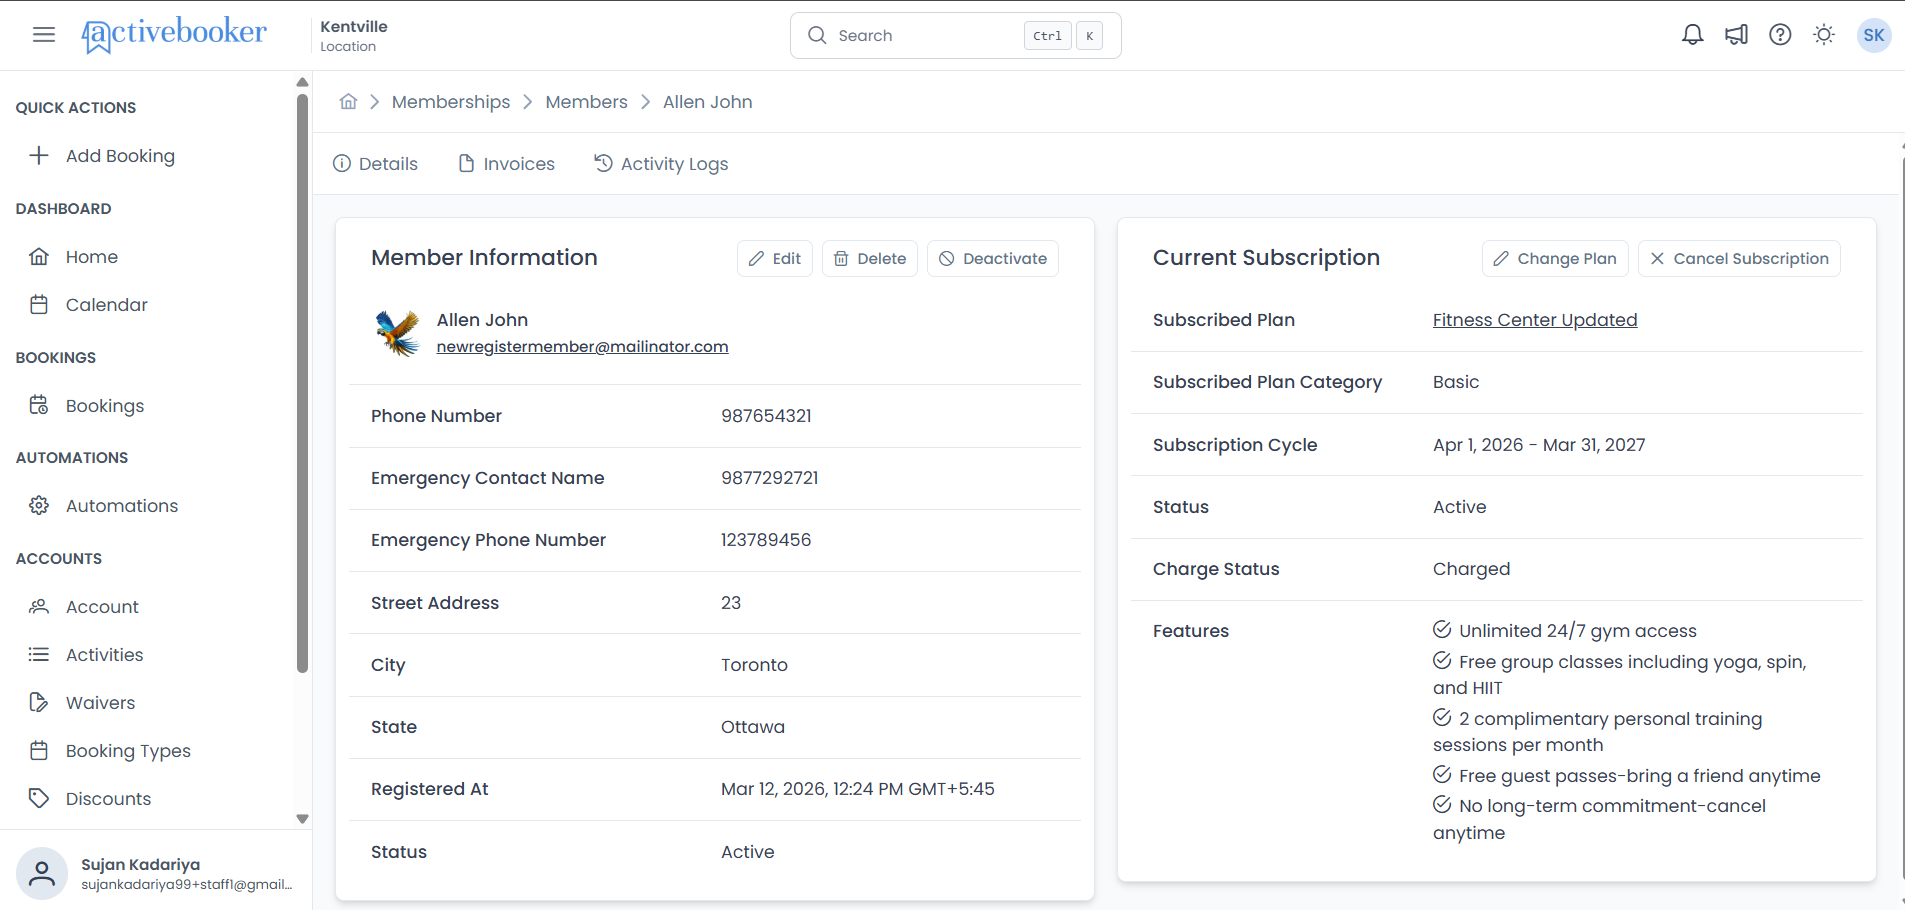
The member detail page displays all member information organized in the Member Information card. The card header shows a circular avatar next to the member's name and email — displaying their profile photo if uploaded, or their initials (first letter of first name + first letter of last name) if no photo exists.
The card includes:
- Member Avatar (profile photo or initials)
- Full Name
- Email Address (with clickable link)
- Phone Number
- Emergency Contact Name
- Emergency Phone Number
- Street Address
- City
- State
- Zip Code
- Registered At (timestamp)
- Status (Active or Deactivated)
Updating Member Information
Editing Member Details
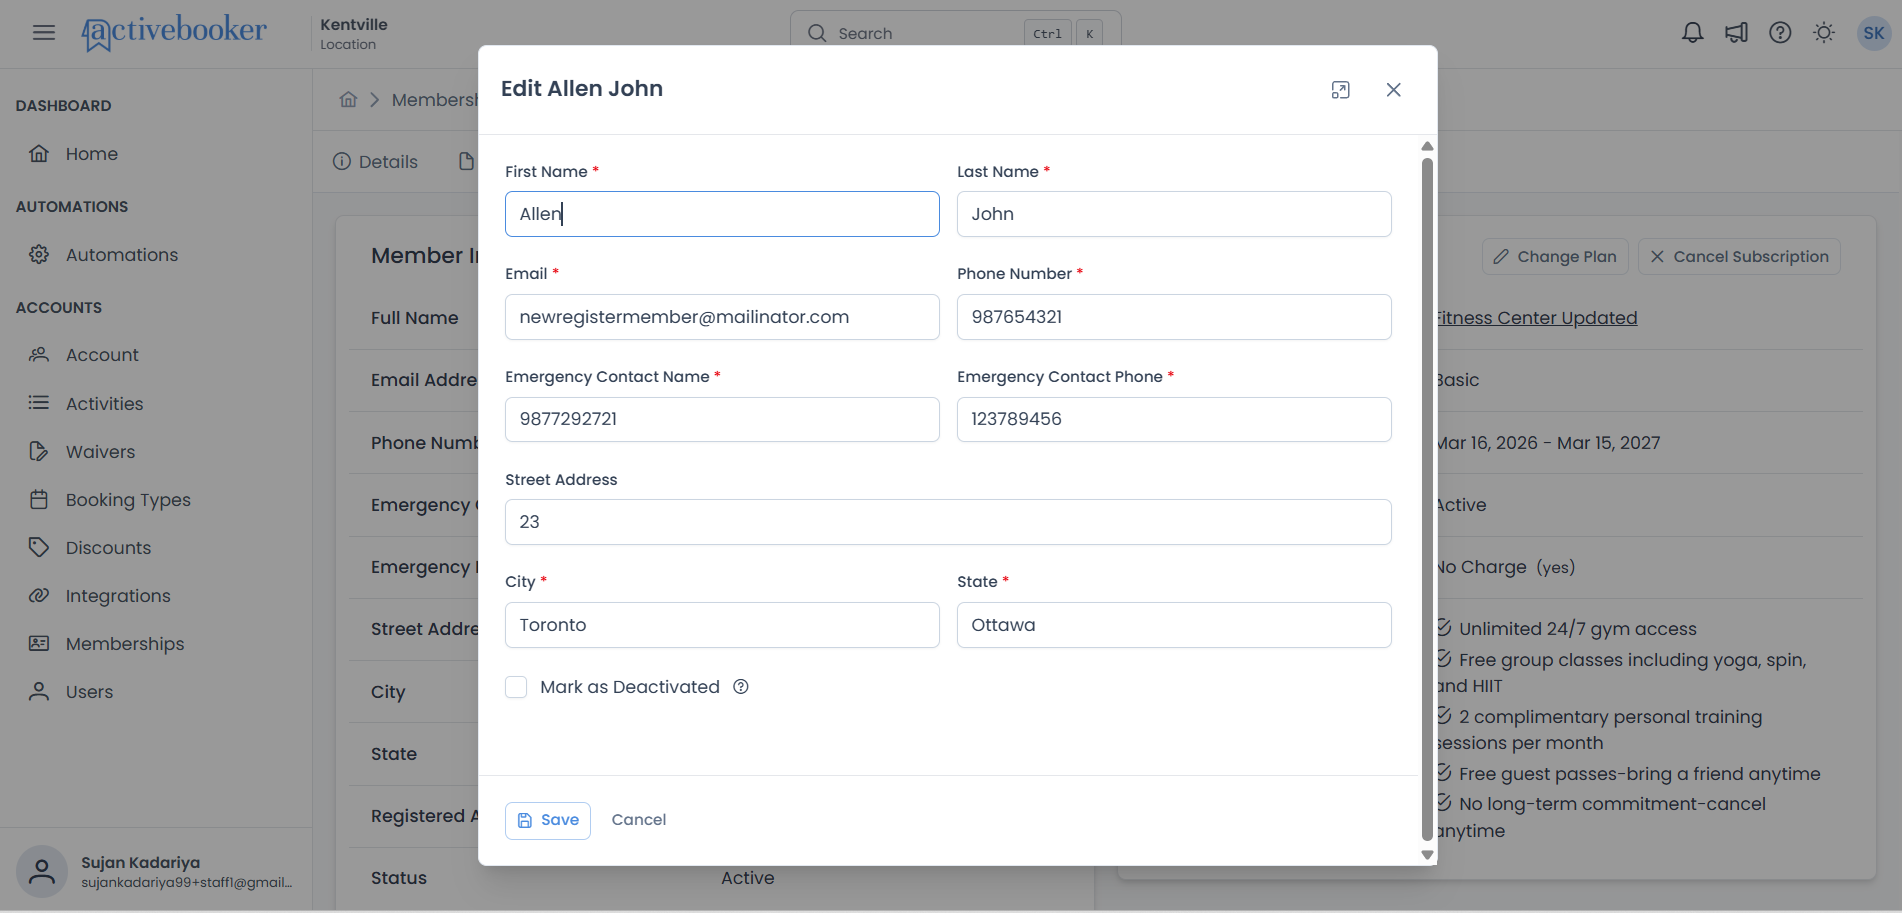
Administrators can update member information through the member detail page:
- Navigate to Memberships > Members
- Find the member and click View Detail
- In the Member Basic Information card, click the Edit button (pencil icon)
- Update the necessary fields in the Edit Member dialog
- Click Save to apply your changes
Important: Email Address Changes
When you change a member's email address, you're changing their login credentials. The member will need to use the new email address to log into the member portal.
What happens when you change the email:
- The member's login credential is updated
- They can no longer log in with the old email address
- They must use the new email for all future logins
- Communication preferences associated with the email are updated
Before you change it:
- Verify the new email address is correct
- Ensure the member is aware of the change
- Confirm they have access to the new email account
- Check that the email isn't already used by another member
Duplicate Email Prevention
The system prevents duplicate email addresses because each email must be unique for login purposes. If you try to save an email that's already in use by another member, you'll see an error message:
"Duplicate entry found. Member with the email address already exists."
In this case, you'll need to choose a different email address or resolve the duplicate account situation.
What Members Can Update Themselves
Members can update their own profile through the member portal:
- First name and last name
- Phone number
- Address, city, state, zip
- Emergency contact information
- Driver's license number
- Profile image
- Password
Note: Members cannot change their own email address. Email changes must be done by administrators to ensure account integrity and proper communication.
What Cannot Be Changed
Some member information is permanent or system-managed:
- Member Code — This unique identifier never changes once assigned
- Registration Date — The original signup date is preserved for historical records
Deleting a Member
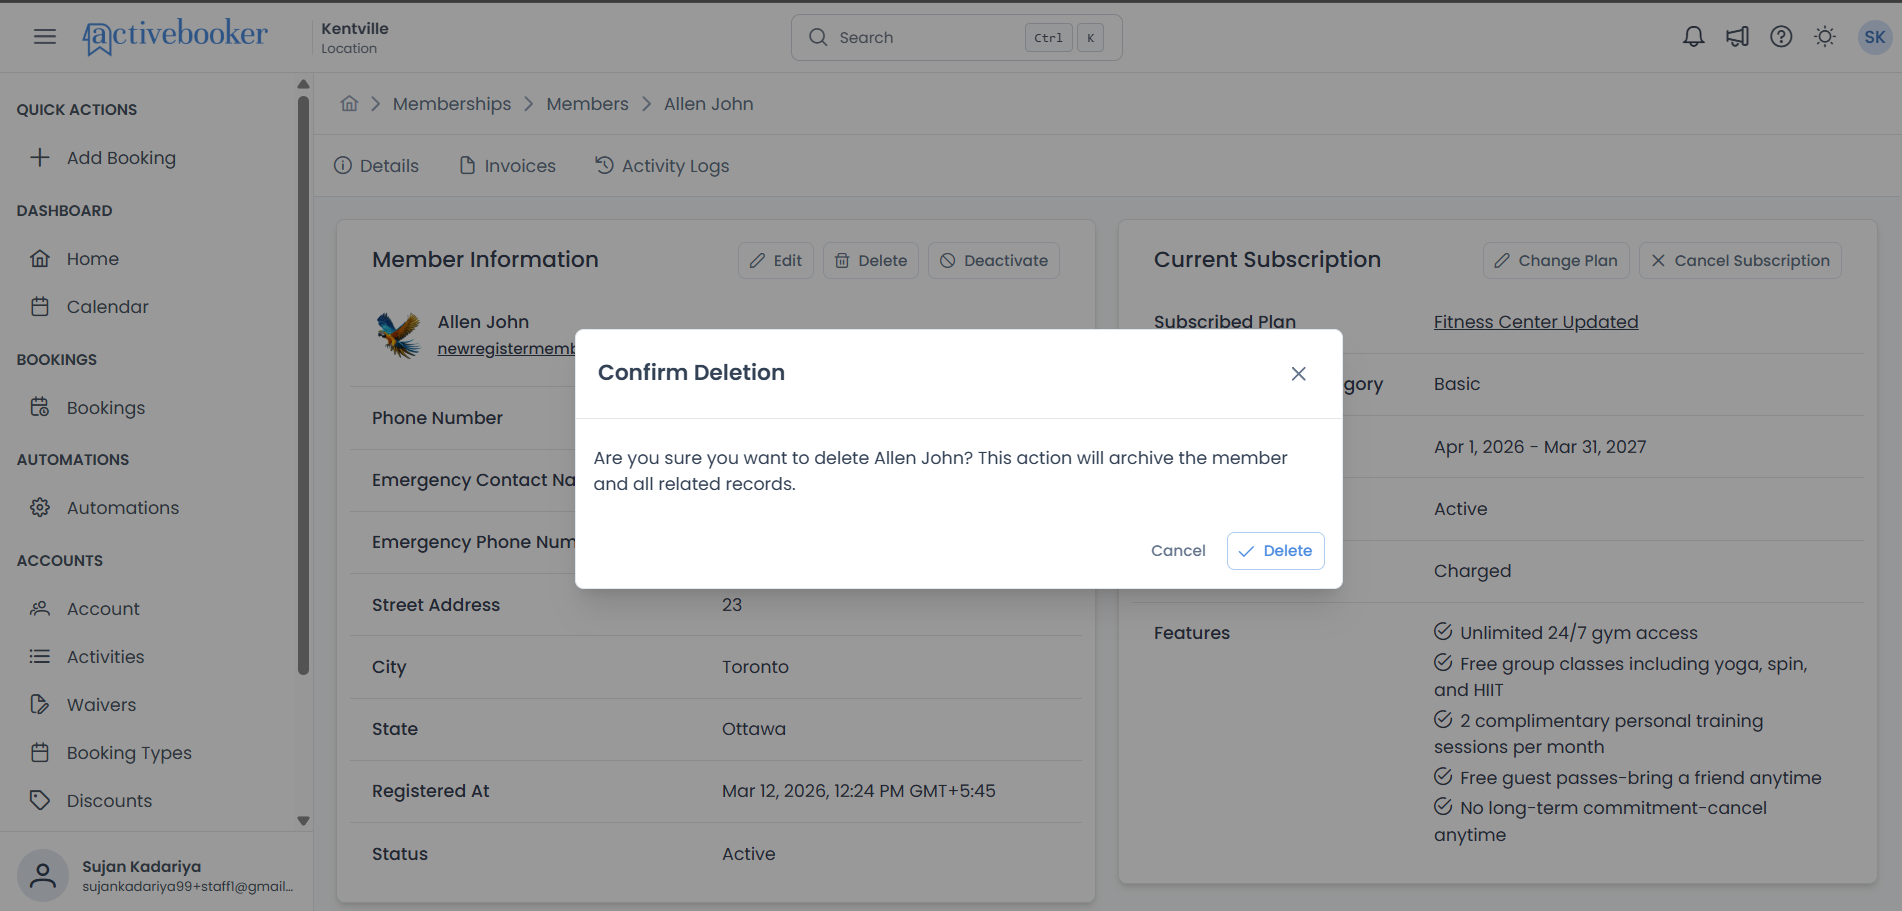
Administrators can permanently archive a member from the Member Detail page. This is a soft delete — the member record is not removed from the database but is archived and hidden from all views.
How to Delete a Member
- Navigate to Memberships > Members
- Find the member and click View Detail
- In the Member Information card, click the Delete button (trash icon) in the toolbar
- A Confirm Deletion dialog will appear
- Click Delete to confirm, or Cancel to abort
What Happens on Deletion
- The member's record is soft-deleted — the
ArchivedAttimestamp is set in the database - All related records (subscriptions, bookings, etc.) are also archived
- The deleted member is removed from all lists, search results, and dropdowns across the application
- The original member data is preserved in the database and is not permanently removed
- You are redirected to the Members list after successful deletion
- A success toast notification is displayed: "Member was deleted successfully."
Once a member is deleted, they cannot be restored through the application interface. Their archived data remains in the database but is no longer accessible to users. Proceed with caution.
Notifications on Deletion
When a member is deleted, the system automatically sends notifications to the client (location user) — not to the deleted member:
- In-app notification: A "Member deleted" notification appears in the notification panel with the message "Member [Name] has been deleted."
- Email notification: An email is sent to the location contact email confirming the deletion
Deletion vs. Deactivation
| Deactivate | Delete | |
|---|---|---|
| Member can log in | No | No |
| Member appears in lists | Yes | No |
| Data visible to admins | Yes | No (archived) |
| Reversible | Yes (Reactivate) | No |
| Use case | Temporary suspension | Permanent removal |
Tip: If you may need to restore the member later, use Deactivate instead of Delete.
Member Status
Understanding Member Status
Every member account has a status that determines their access and privileges:
Active Status:
- Can log in to the member portal
- Can make bookings (subject to their plan rules)
- Receives communications and notifications
- Has full member experience and benefits
Deactivated Status:
- Cannot log in to the member portal
- Cannot make new bookings
- Will not receive member benefits
- Historical data and booking history remain accessible to administrators
- Useful for members who have left but whose records you want to retain
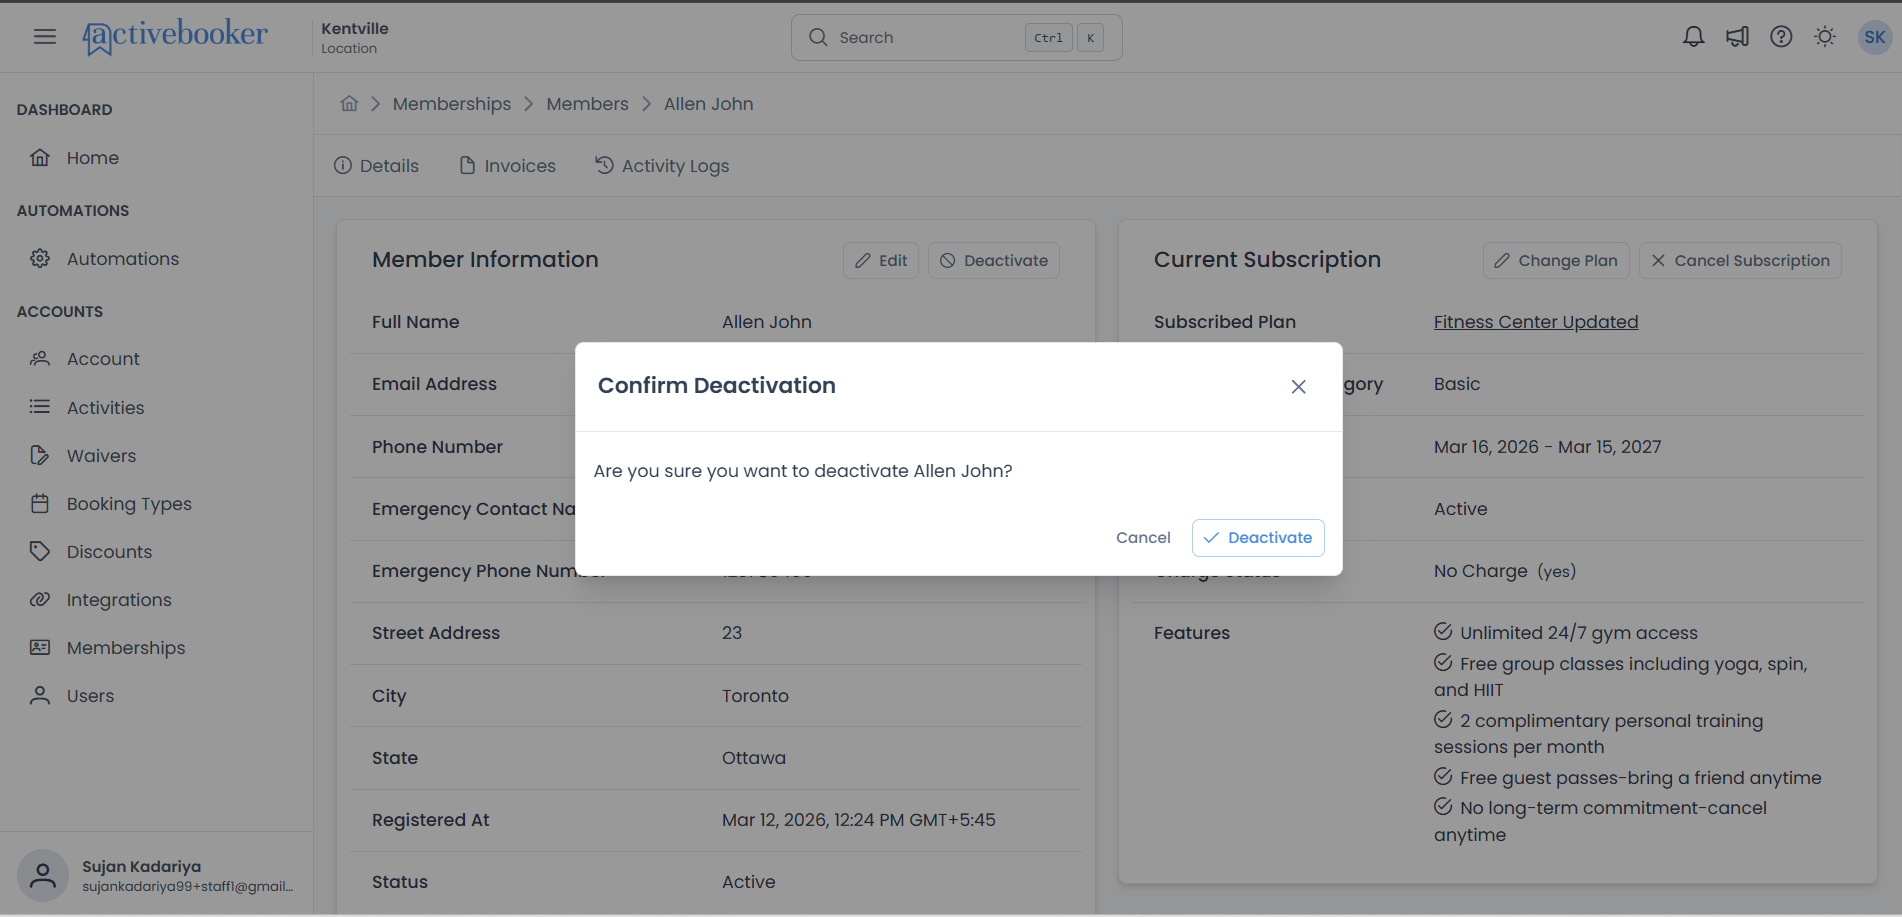
Deactivating a Member
You can deactivate a member directly from the Member Information section using the dedicated toolbar button:
- Navigate to Memberships > Members
- Find the member and click View Detail
- In the Member Information card, click the Deactivate button in the toolbar
- A confirmation dialog will appear — confirm the action to proceed
The member's account is deactivated immediately.
When to deactivate a member:
- Member requests to close their account
- Non-payment after multiple attempts
- Violation of terms of service
- Temporary suspension
- Member has moved or is no longer eligible
Deactivating a member will revoke their access to the member portal and prevent them from receiving membership benefits. This action does not delete their account or historical data—it simply suspends access.
Reactivating a Member
To reactivate a deactivated member:
- Open the member's detail page
- In the Member Information card, click the Activate button in the toolbar
- A confirmation dialog will appear — confirm the action to proceed
The member will immediately regain access to the member portal and their account privileges.
Deactivation vs. Subscription Cancellation
Important distinction:
- Deactivating affects login access and member portal features
- Cancelling a subscription affects the member's plan and billing
These are separate actions:
- You can deactivate a member while keeping their subscription active (they can't log in but still have a plan)
- You can cancel a subscription while keeping the member account active (they can log in but have no active benefits)
- Typically, you'll want to handle both: cancel the subscription AND deactivate the account
Visual Indicators
Deactivated members are clearly marked throughout the system:
- In the member list, their Member Id shows a red "Deactivated" tag
- The member detail page displays their deactivated status
- Reports and analytics can filter by activation status
Note: Deactivating a member doesn't automatically cancel their subscription. Handle subscription cancellation separately if needed.