Register Member
Add new members to your location quickly using the registration form. Fill in their details, choose a plan, and the system takes care of the rest — setting up their account, subscription, invoice, and sending all the right notifications.
Quick start
Get a new member registered in just a few steps:
- Go to Memberships > Members
- Click the + Add Member button (top-right of the member list)
- Fill in the member's personal details and select a plan
- Click Save
Note: You need Admin or Owner permissions to register members.
What you can do
The registration form helps you:
- Create member accounts — Set up a new member with their personal details and contact information
- Assign a membership plan — Choose from your active plans to start their subscription immediately
- Skip payment when needed — Use the "Do Not Charge" option for members who pay offline (e.g., cash)
- Automate notifications — The system automatically sends a welcome email to the member and notifies your team
How it works
Overview
When you register a new member, the system creates their account, starts their subscription, generates an invoice, and sends out notifications — all in one step. The member receives a welcome email with their login details and can start using the member portal right away.
Key concepts
Member Code
Every member gets a unique code when they're registered (e.g., M260310-A3B2C1). This is generated automatically based on the registration date.
Subscription Cycle The subscription starts on the registration date and runs for the length of the selected plan. For example, registering on Mar 10, 2026 with a 2-month plan creates a cycle from Mar 10, 2026 to May 9, 2026.
Do Not Charge An option that lets you register a member without collecting payment. Useful when a member pays with cash or another offline method.
Using this feature
Fill in the registration form
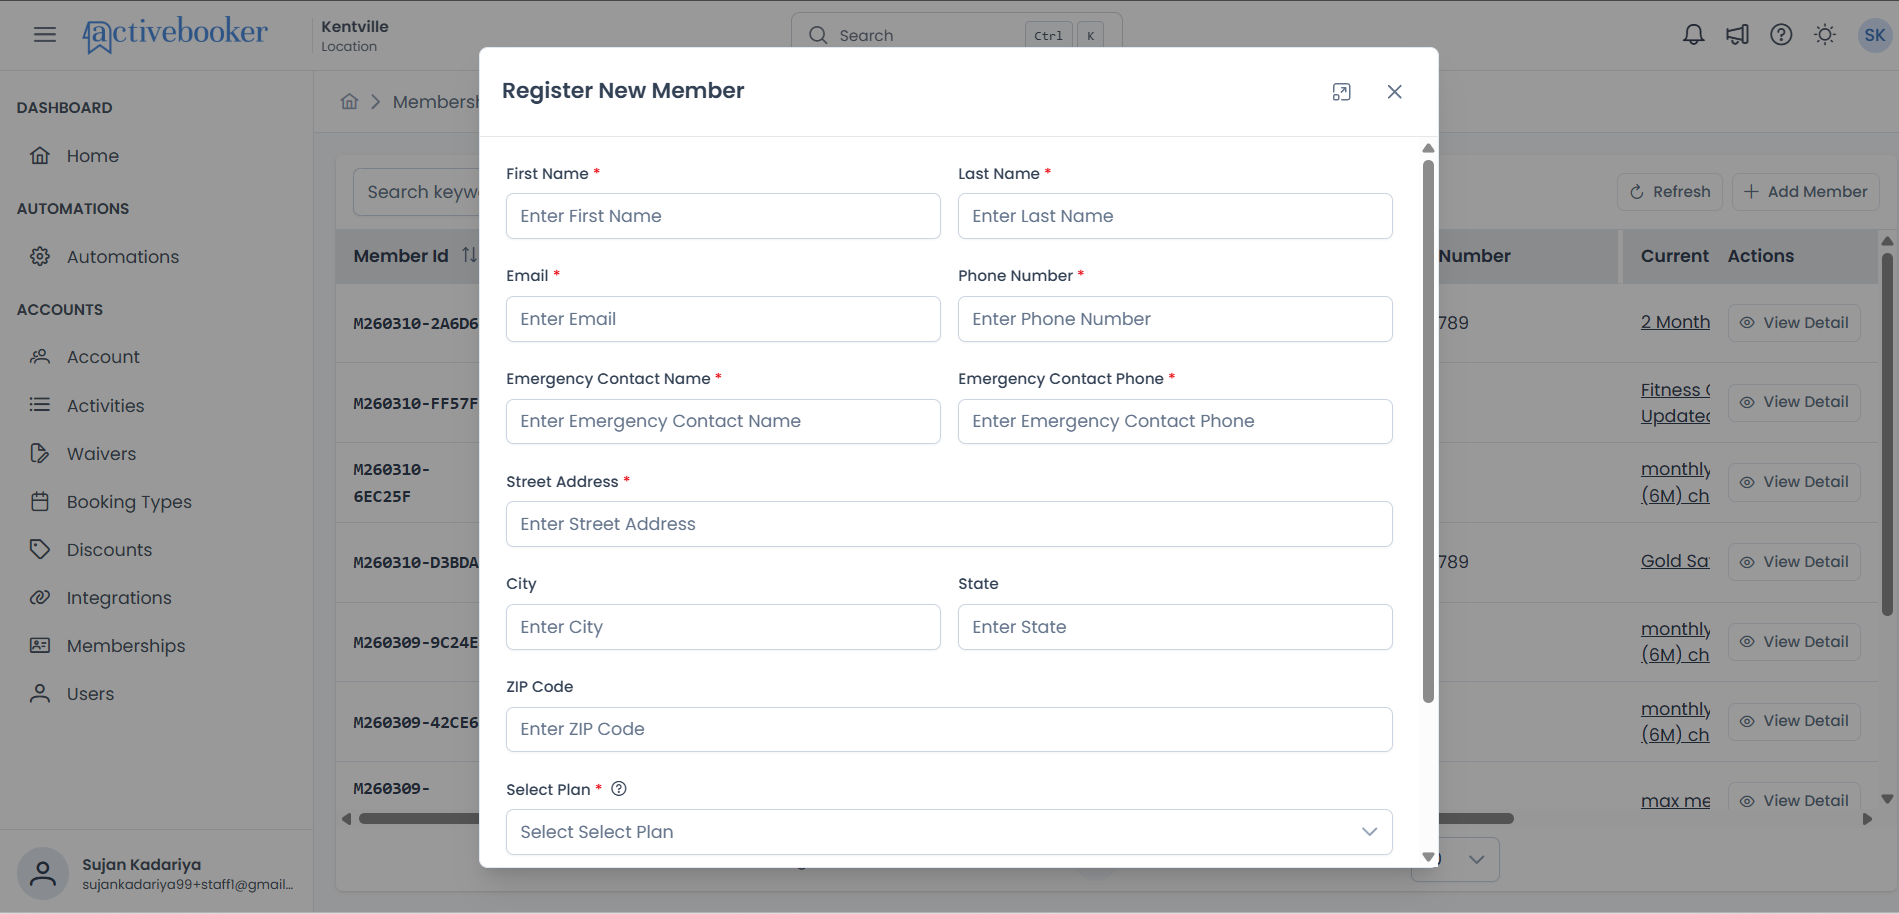
The form includes the following fields:
- First Name — The member's first name as it should appear on their account.
- Last Name — The member's last name as it should appear on their account.
- Email — The member's email address. This will also be used as their login to the member portal, so make sure it's accurate.
- Phone Number — A contact phone number for the member.
- Emergency Contact Name — The full name of someone to contact in case of an emergency.
- Emergency Contact Phone — A phone number for the emergency contact.
- Street Address — The member's street address.
- City — The member's city of residence.
- State — The member's state of residence.
- ZIP Code — The member's postal ZIP code.
- Driver License Number — The member's driver license number, if applicable.
- Select Plan — Choose the membership plan to enroll the member in. Only active plans will appear in the dropdown.
Your location settings control which fields appear on the form. You may see a different set of fields depending on your configuration.
Select a plan
The Select Plan dropdown shows only your currently active plans. If you don't see the plan you're looking for, check that it's marked as active in your plan settings.
Register without charging
If the member is paying offline (e.g., cash, check), you can skip the online payment:
- Check the Do Not Charge checkbox
- Enter a reason in the Reason field that appears (e.g., "Paid in cash")
- Complete the rest of the form and click Save
The member's profile will show No Charge along with the reason you entered, and a $0 invoice will be created with Paid status.
Save and confirm
Click Save to complete the registration. The system will:
- Verify all required fields are filled in correctly
- Create the member's account and login credentials
- Start their subscription
- Generate an invoice
- Send a welcome email to the member
- Notify your team via email and in-app notification
- Log the registration in the member's activity history
Common scenarios
Scenario 1: Register a member with online payment
This is the standard flow for members who will pay through the platform:
- Click + Add Member from the Members page
- Fill in all required fields
- Select the appropriate plan
- Leave the Do Not Charge checkbox unchecked
- Click Save
The member receives a welcome email, and an invoice is generated for the plan amount plus any applicable tax.
Scenario 2: Register a member who paid in cash
For members who have already paid or will pay offline:
- Click + Add Member from the Members page
- Fill in all required fields and select a plan
- Check the Do Not Charge checkbox
- Enter a reason (e.g., "Paid in cash")
- Click Save
A $0 invoice is created with Paid status, and the member's profile reflects the no-charge reason.
Understanding the interface
Registration form
When you click + Add Member, a dialog opens with all the fields needed to create a member account.
Personal Details The top section collects the member's name, email, phone number, and address information.
Emergency Contact A dedicated section for the emergency contact name and phone number.
Plan Selection A dropdown at the bottom where you choose which membership plan to assign.
Do Not Charge A checkbox option that, when selected, reveals a reason field. Use this for offline payments.
After saving
Once registered, the member appears in your member list. From there you can:
- Click View Detail to see their full profile, subscription, and invoices
- Track their registration event in the Activity Logs tab
Best practices
✓ Double-check the email address — The email is used as the member's login, so make sure it's correct before saving
✓ Always enter a clear reason when using Do Not Charge — This helps your team understand why payment wasn't collected (e.g., "Paid in cash," "Complimentary membership")
✓ Verify the plan before saving — Make sure you've selected the right plan, as the subscription starts immediately upon registration
✗ Avoid using duplicate emails — Each email can only be used once per location. If the email is already in use, you'll need to use a different one
✗ Don't rush past required fields — The form won't save until all required fields are properly filled in
Tip: If a plan isn't showing in the dropdown, check that it's set to active in your plan settings.
Permissions and access
- Owners — Can register members and manage all settings
- Admins — Can register members and view member details
- Members — Cannot register other members; can only access the member portal
Troubleshooting
Issue: "Email already in use" error
Why this happens: Another member at your location is already registered with that email address. Email addresses must be unique per location, regardless of upper/lowercase. How to fix it:
- Search for the existing member using that email in your member list
- Use a different email address for the new member
- If the existing member is no longer active, consider updating their email first
Issue: A plan is missing from the dropdown
Why this happens: Only active plans appear in the Select Plan dropdown. How to fix it:
- Go to your membership plan settings
- Check that the plan you're looking for is set to Active
- Return to the registration form — the plan should now appear
Issue: Unable to register new members
Why this happens: Your location or the selected plan may have reached its maximum member capacity. How to fix it:
- Check your location's member limit in your settings
- Check the selected plan's member capacity
- Increase the limit or move existing members to a different plan to free up space
Can't find what you're looking for?
If you're experiencing a different issue:
- Check your account permissions to ensure you have the right access level
- Verify that your payment settings are properly configured
- Contact your account administrator for help
Limits and considerations
- Unique emails: Each email address can only be used once per location
- Plan capacity: Individual plans may have a maximum number of members
- Location capacity: Your location may have an overall member limit
- Payment setup: Online invoicing requires your payment settings to be configured. Without this, invoices will not be generated
Frequently asked questions
Can a member log in immediately after registration?
Yes. Once registered, the member receives a welcome email with their login details and can access the member portal right away. They can set up their payment method, view invoices, and make bookings.
What happens to the subscription when I register a member?
The subscription starts on the registration date and is set to Active. The end date is calculated based on the plan's duration. You can view these details in the member's Current Subscription section.
What invoices are created when I register a member?
It depends on the plan type and whether you used "Do Not Charge":
| Scenario | Invoice Amount | Invoice Status |
|---|---|---|
| Do Not Charge | $0 | Paid |
| One-time payment plan | Plan amount + tax | Unpaid |
| Recurring payment plan | Plan amount + tax (per billing cycle) | Unpaid |
Who gets notified when I register a member?
Three notifications are sent:
- A welcome email to the new member
- A notification email to all contact emails configured for your location
- An in-app notification to all users at your location
Can I edit a member's information after registration?
Yes. Go to the member's detail page and update their personal details, subscription, or other information at any time.
Related resources
- Member Information — View and edit a member's profile
- Subscription Details — Manage a member's subscription and plan
- Activity Logs — Track member events and history
- Payment Settings — Configure your location's payment setup