Step 1: Customer
The first step in creating a booking is entering the customer's contact information and recording how they are making the booking. This ensures every booking is linked to an identifiable customer record.
Quick start
Complete the Customer step in just a few steps:
- Open the Create Booking dialog from the Bookings page or the QUICK ACTIONS sidebar
- Select a booking channel — Walk In or Phone
- Fill in the customer's Full Name, Email Address, and Phone Number
- Click Next → to move to the Booking step
What you can do
The Customer step helps you:
- Record who is booking — Capture the customer's name, email, and phone number so the booking is linked to them
- Choose the booking channel — Record whether the customer is present in person or calling over the phone
- Block time for internal use — Use the Internal Booking option to reserve time slots for staff purposes, so customers cannot book that time
How it works
Overview
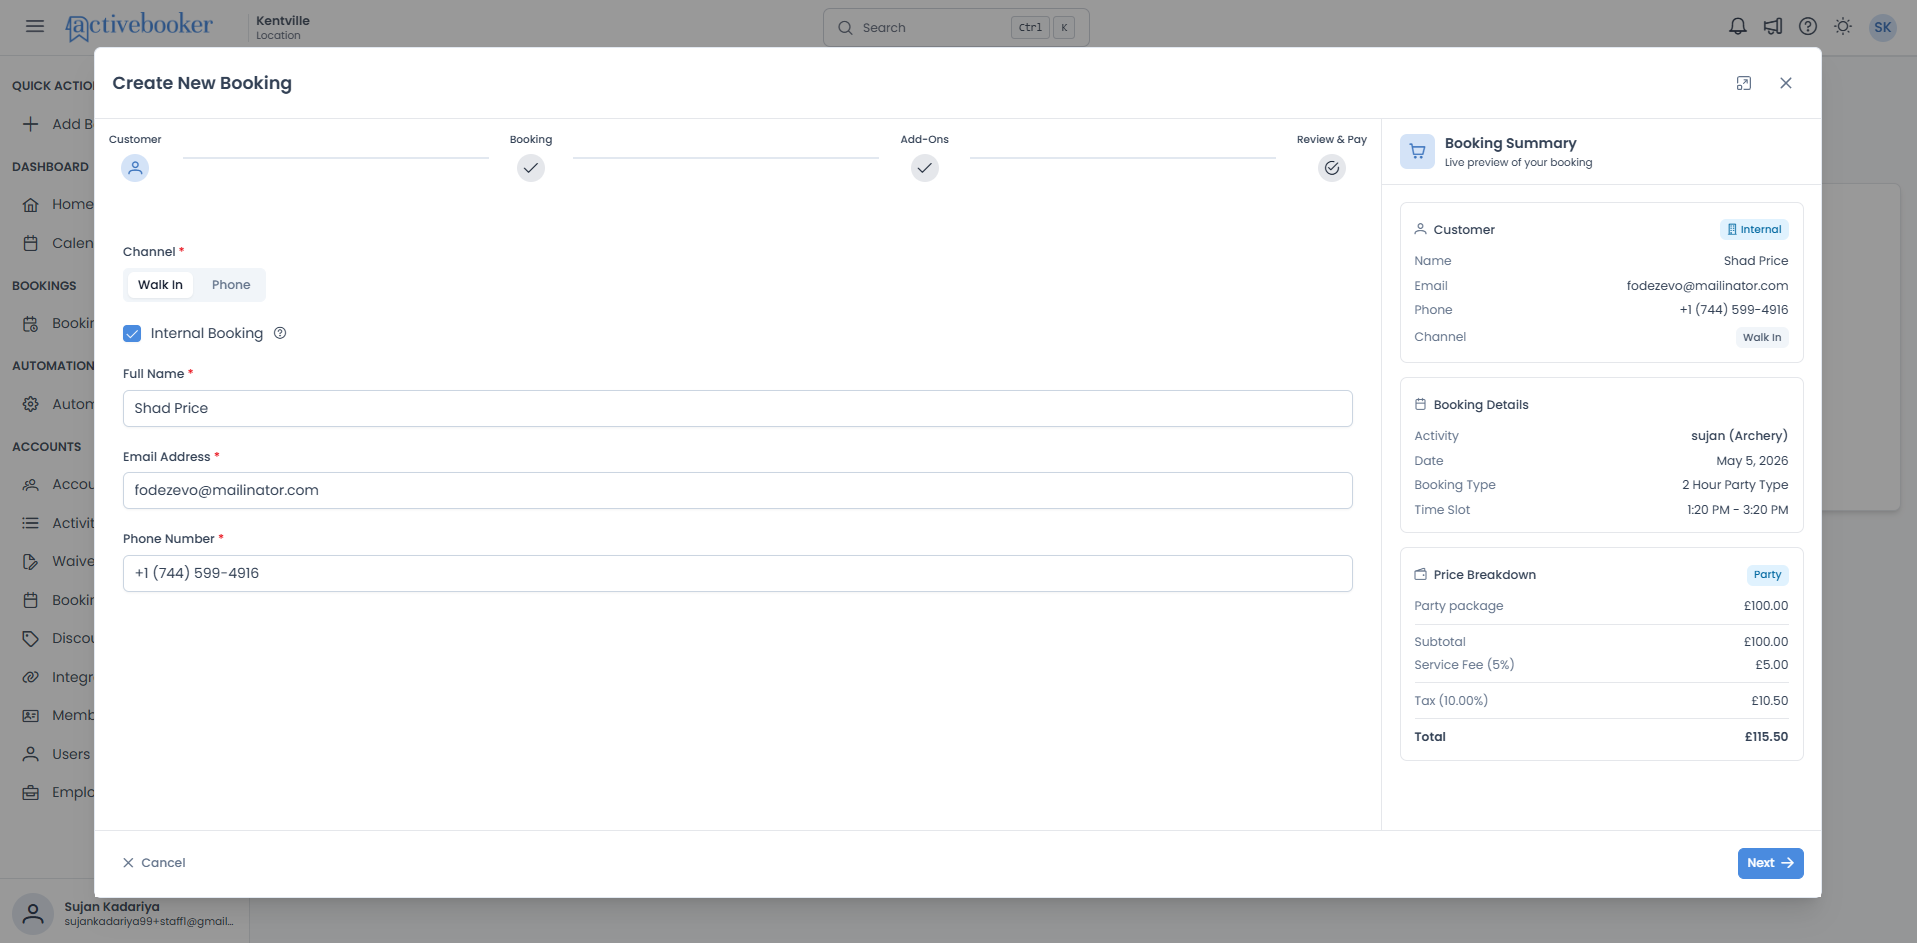
When you open the Create Booking dialog, you land on the Customer step. Here you identify who the booking is for and how it is being made. All the information you enter is shown in the Booking Summary panel on the right side of the dialog, so you can confirm it looks correct before moving on.
Key concepts
Booking channel
The channel tells the system how the booking was initiated. Select Walk In if the customer is at your location in person, or Phone if they are calling to book. This is recorded on the booking and visible in your bookings list.
Internal Booking
A way to reserve time slots for internal purposes — such as staff meetings, maintenance windows, or private events — that should not be available to regular customers. When enabled, the customer fields are filled automatically with your location's internal booking details.
Booking Summary panel
The panel on the right side of the dialog that shows a live preview of everything you have entered so far. It updates in real time as you fill in or change fields on this step.
Entering customer information
Choosing a booking channel
At the top of the form, select one of two channels:
Walk In
Choose this when the customer is physically present at your location and making the booking in person. This is the default option.
Phone
Choose this when the customer is calling to make a reservation over the phone.
Your selection is immediately reflected in the Booking Summary panel under the Channel field.
Using Internal Booking
Check the Internal Booking checkbox to reserve a time slot for staff purposes instead of a regular customer booking. When you check this box:
- The Full Name, Email Address, and Phone Number fields are automatically filled in using your location's internal booking settings
- An Internal badge appears in the Booking Summary panel to clearly mark this as a non-customer booking
- The reserved time slot will not be available for customers to book online
If you uncheck the box, the fields return to what you had typed before — your previous input is not lost.
Tip: Use Internal Booking to block off time for maintenance, staff training, private parties, or any other internal reason.
What you'll see in the Booking Summary
As you fill in the Customer step, the Booking Summary panel on the right-hand side updates to show:
| Field | Description |
|---|---|
| Name | The full name you entered |
| The email address you entered | |
| Phone | The phone number you entered |
| Channel | Walk In or Phone, depending on your selection |
| Internal badge | Shown only when Internal Booking is checked |
Use the summary to check that the customer's details are correct before continuing.
Common scenarios
Booking for a walk-in customer
When a customer arrives at your location without a prior reservation:
- Keep the channel set to Walk In (default)
- Enter their Full Name, Email Address, and Phone Number
- Verify the details in the Booking Summary panel on the right
- Click Next → to continue to the Booking step
Booking for a customer calling by phone
When a customer calls to make a reservation:
- Click Phone to switch the channel
- Enter the customer's Full Name, Email Address, and Phone Number as they provide them
- Verify the details in the Booking Summary panel
- Click Next → to proceed
Blocking time for internal use
When you need to reserve a time slot for staff purposes:
- Check the Internal Booking checkbox
- The customer fields are automatically populated — no manual input needed
- Confirm the Internal badge appears in the Booking Summary
- Click Next → to select the activity, date, and time slot to block
Troubleshooting
Issue: "Next" button is not clickable
Why this happens: One or more required fields are empty or contain an invalid value.
How to fix it:
- Check that Full Name, Email Address, and Phone Number are all filled in
- Look for any red validation messages below the fields — they will tell you exactly what needs to be corrected
- Once all fields show valid values, the Next → button becomes active
Issue: A validation message appears under a field
Why this happens: The value entered does not meet the required format. Common causes are an email address missing the @ symbol or a field left completely empty.
How to fix it:
- Read the message displayed below the field
- Correct the value to match the expected format
- Click elsewhere or attempt to proceed — the message clears once the field is valid
Issue: I checked Internal Booking but want to go back to a customer booking
Why this happens: Internal Booking auto-fills the fields with location data.
How to fix it:
- Uncheck the Internal Booking checkbox
- The fields return to any values you had entered previously
- If the fields are empty, fill them in with the customer's details as normal
Frequently asked questions
Can I save a booking without entering an email address?
No. Full Name, Email Address, and Phone Number are all required. You must fill in all three before you can move to the next step.
What does the Internal badge mean on the Booking Summary?
It indicates the booking is for internal purposes only and is not a customer-facing reservation. The booked time slot will be blocked from customer bookings.
Can I change the channel after filling in the customer details?
Yes. You can switch between Walk In and Phone at any time on this step. The fields you have already filled in are not affected — only the Channel value in the Booking Summary updates.
What happens if I close the dialog on this step?
Clicking Cancel or the ✕ close icon discards everything you have entered. No booking is created and no data is saved. The next time you open the dialog, all fields will be empty.