Booking Page UI Preference
Booking Page UI Preferences control how customers see and interact with your booking form. Customize field labels, show or hide pricing information, and add opt-in content to create the perfect booking experience for your customers.
Quick Start
Configure your booking page preferences:
- Navigate to your booking type detail page and click the Price tab
- Locate the Booking Page UI Preference section
- Click Edit to open the configuration dialog
- Customize labels, pricing display, and opt-in content
- Click Save to apply changes
What You Can Control
The Booking Page UI Preference settings let you customize:
- Field labels — Change how quantity fields are labeled (e.g., "Number of Adults", "Guests", "Participants")
- Price visibility — Choose whether to show unit prices next to quantity fields
- Opt-in functionality — Enable checkbox agreements customers must accept before booking
- Opt-in content — Add formatted text explaining what customers are agreeing to
Accessing UI Preferences
To view or edit booking page UI preferences:
- Navigate to Activities > select your activity
- Click on Booking Types in the activity detail tabs
- Click on View Detail for the specific booking type you want to configure
- In the Booking Page UI Preference section, click Edit
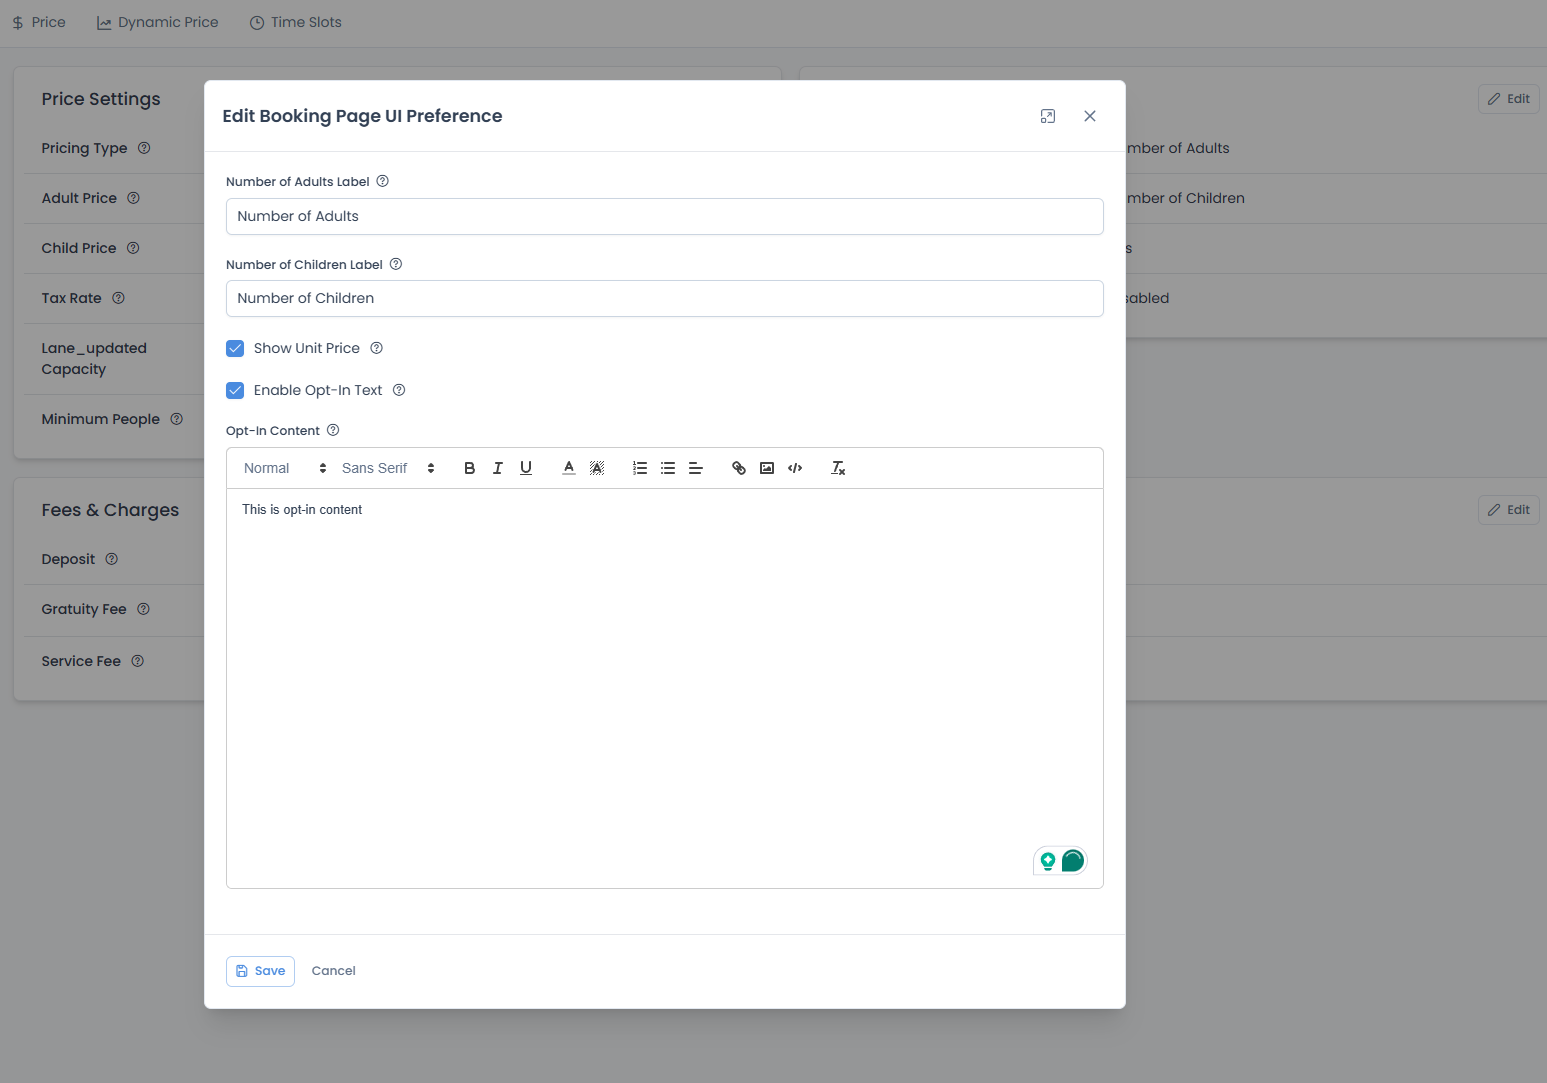
The Edit Booking Page UI Preference dialog opens with all customization options.
Configuration Fields
Number of Adults Label
The text label customers will see for the adults field when making a booking. This label appears on the booking page to help customers understand they are selecting the number of adult participants.
Field Name: Number of Adults Label
Common alternatives:
- "Number of Adult Participants"
- "Number of Adult Guests"
- "Number of Adult Players"
- "Adult Group Size"
- "Adult Party Size"
- "How many adults?"
Choose labels that clearly communicate what customers are selecting. Avoid jargon or cute names that might confuse first-time bookers.
Number of Children Label
The text customers will see for the children field when making a booking. This label helps customers select the number of child participants. The field is shown only if the pricing type is Person.
Field Name: Number of Children Label
Common alternatives:
- "Number of Child Participants"
- "How many kids?"
Show Unit Price
Controls whether the per-person or per-unit price displays next to the quantity selector.
Field Type: Checkbox
Default: Unchecked (prices hidden)
Options:
- Checked (Yes) — Unit price displays next to the quantity field
- Unchecked (No) — Unit price is hidden; customers only see the total at checkout
Enable Opt-In
Adds a required checkbox that customers must accept before completing their booking.
Field Type: Checkbox
Default: Unchecked (opt-in disabled)
Options:
- Checked — Opt-in checkbox appears on booking page with your custom content
- Unchecked — No opt-in requirement
Common uses for opt-in:
- Liability waivers and acknowledgments
- Terms and conditions agreement
- Photo/video release permissions
- Safety guidelines confirmation
- Age restriction acknowledgments
How it works:
- Customer fills out booking details
- Before proceeding to payment, they see the opt-in checkbox
- They must check the box to continue
- The checkbox is linked to your formatted opt-in content
When enabled, customers cannot complete their booking without checking the opt-in box. Make sure your opt-in content clearly explains what they're agreeing to.
Opt-In Content
The formatted text that appears with the opt-in checkbox. This field only appears when "Enable Opt-In" is checked.
Example content:
By checking this box, I acknowledge that:
• I have read and agree to the facility's safety guidelines
• I understand the physical nature of this activity
• I am aware of and accept any risks involved
• I will follow all instructions provided by staff members
While you can add extensive content, shorter, clearer opt-in text leads to better customer completion rates. If you need lengthy legal terms, consider linking to a separate terms page.
Saving and Applying Changes
After configuring your UI preferences:
- Review all settings to ensure they reflect your desired customer experience
- If you enabled opt-in, preview your opt-in content for clarity
- Click Save to apply the changes
After saving changes, open your booking page in a private/incognito browser window to see exactly what customers will experience. This helps you catch confusing labels or poorly formatted opt-in content before customers do.
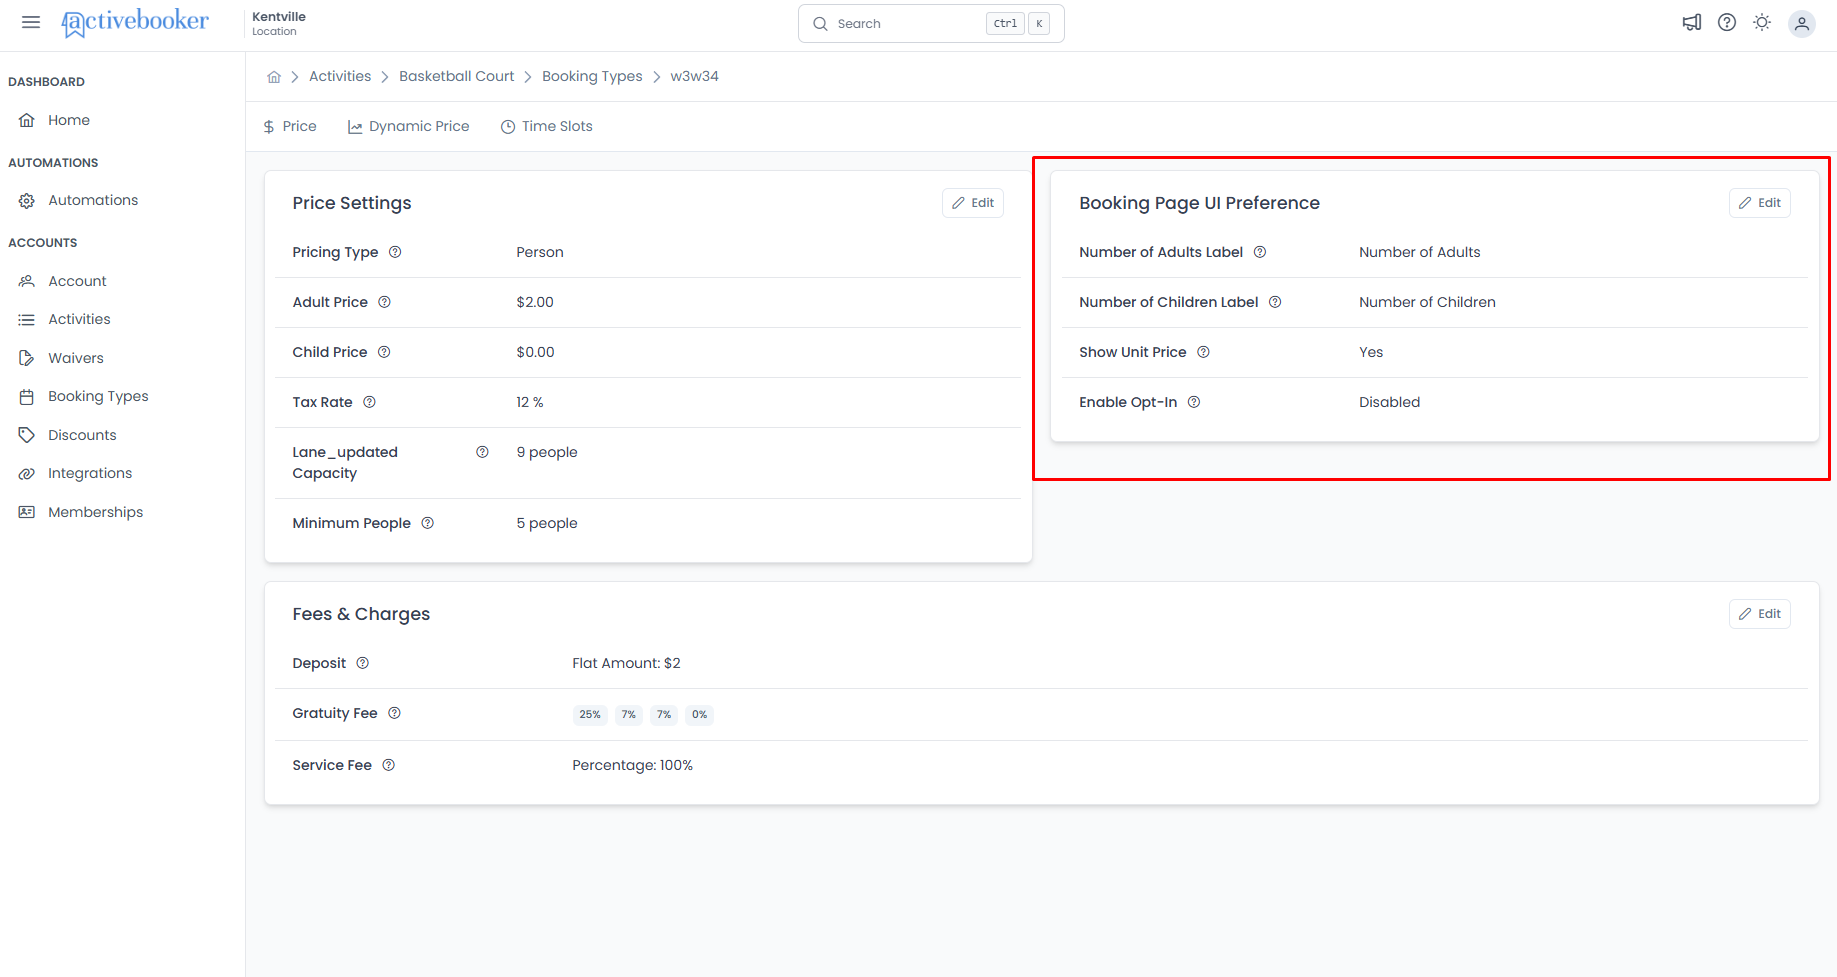
UI Preference Display
After saving, the Booking Page UI Preference section displays your current configuration:
Fields Shown:
- Number of Adults Label: The custom label you set for Adults (e.g., "Number of Adult Participants")
- Number of Children Label: The custom label you set for Children (e.g., "Number of Child Participants")
- Show Unit Price: "Yes" or "No"
- Enable Opt-In: "Enabled" or "Disabled"
The opt-in content itself is not shown in the summary view. To review or edit it, click Edit to open the dialog again.
Frequently Asked Questions
Can I have different UI preferences for different booking types?
Yes. Each booking type has its own UI preference settings, so you can customize labels and opt-ins independently for different activities.
What happens if I enable opt-in but don't add content?
The system requires opt-in content when you enable the feature. You must add content before you can save the configuration.
Can customers un-check the opt-in box?
Yes, they can check and un-check it. However, they cannot proceed with the booking unless the box is checked at submission time.
Does the opt-in content have legal standing?
The opt-in creates a record of customer acknowledgment. However, for legally binding waivers, we recommend using the dedicated Waivers feature, which provides more robust tracking and legally defensible documentation.
Can I include images in the opt-in content?
The rich text editor supports image insertion, but we recommend keeping opt-in content text-focused for faster loading and better mobile experience.
Will changes affect existing bookings?
No. UI preference changes only affect the booking page experience for new customers. Existing bookings are not retroactively altered.
Can I preview what customers see before saving?
Currently, you need to save changes to see them on the live booking page. We recommend testing in a separate browser or having a colleague test before announcing changes to customers.
Related Topics
- Price Settings - Configure the actual prices customers pay
- Fees and Charges - Add deposits, gratuity, and service fees to bookings